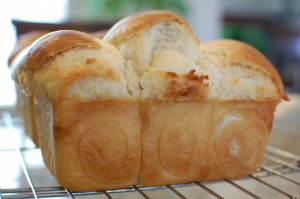
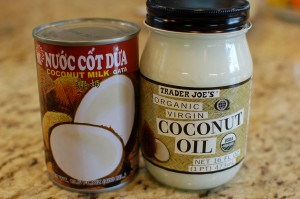
OMG. This bread is so good! I’ve been trying to re-create this bread (also found in Chinese bakeries as “Coconut buns”) for a long time… I finally figured out the trick – ditch the butter and milk, and use coconut oil and coconut milk instead! Coconut oil is a solid at room temperature – similar in texture to shortening or lard – and it makes a HUGE difference in the flavor of this bread. I found coconut oil at Trader Joe’s – but I have also seen it at health food/farmer’s market type grocery stores. Technically, you could substitute regular butter for the coconut oil… but the end result just won’t be as good… so get yourself a jar of coconut oil!!!!
I made this bread as three mini-loaves that can be pulled apart into three buns each. You could make this as one large loaf instead if you don’t have mini-loaf pans – but in that case, you would want to start with four ovals of dough (instead of 9), and you will want to bake the loaf for 30-35 minutes (instead of 22 minutes for the three smaller loaves). Enjoy!
Coconut Milk Bread:
- 2 1/2 c. bread flour
- 1/2 c. coconut milk
- 1 egg
- 3 T. coconut oil
- 1/2 tsp. salt
- 4 T. sugar
- 2 tsp. active dry yeast
- 1/2 c. tang zhong
Tang Zhong:
- 1/3 c. bread flour
- 1 c. water
- 1 c. sweetened flaked coconut
- 3 T. coconut oil
- 3 T. sugar
- 1/4 tsp. salt
- 1 egg yolk + 1 T. water
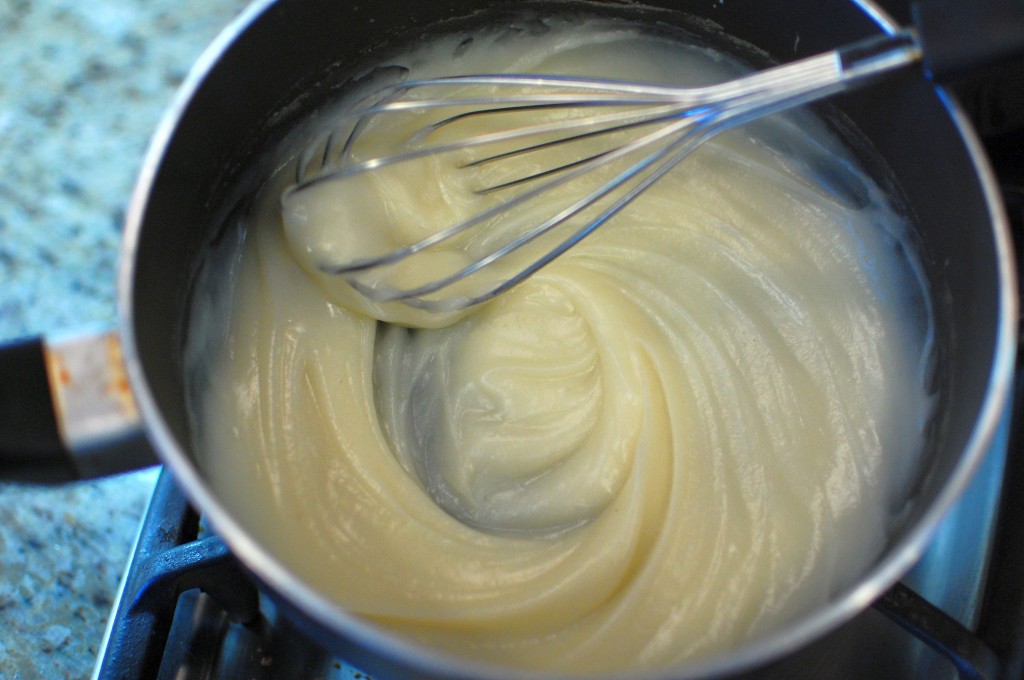
1. First, make the tang zhong. Combine the bread flour and water in a small sauce pan, and whisk over medium high heat until thick and swirl lines appear. Remove from heat and allow to cool.
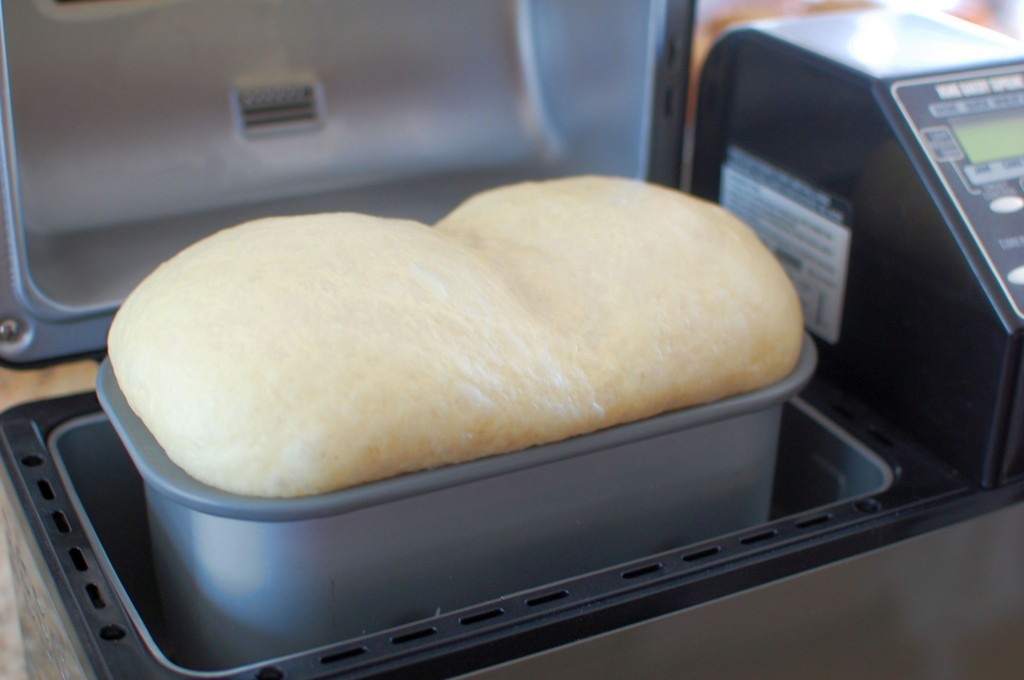
2. Then, make the dough. Combine all the ingredients in a bread machine (I LOVE my Zojirushi Bread Machine!) and set the “basic dough” function on. (If you don’t have a bread machine, you can knead all the dough ingredients by hand or with a dough hook on a stand mixer – about 15 minutes, then let rise for 45 minutes, punch down, and let rise another 30-45 minutes.)
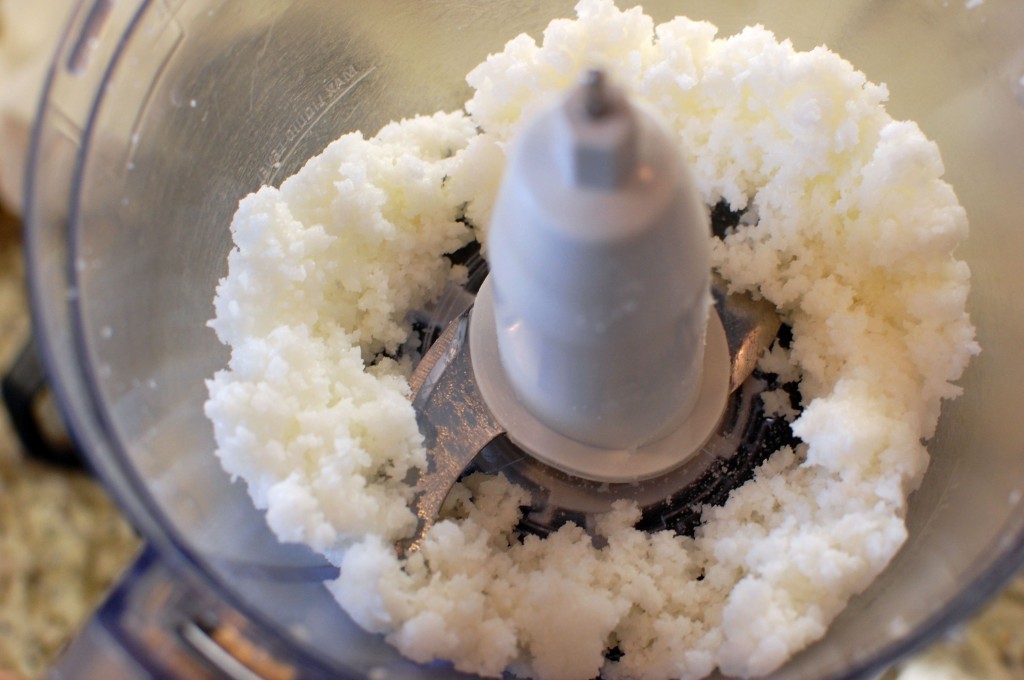
3. To make the filling, put all the filling ingredients into the workbowl of a food processor and pulse for about 30 seconds until uniform in texture (coarse crumbs).
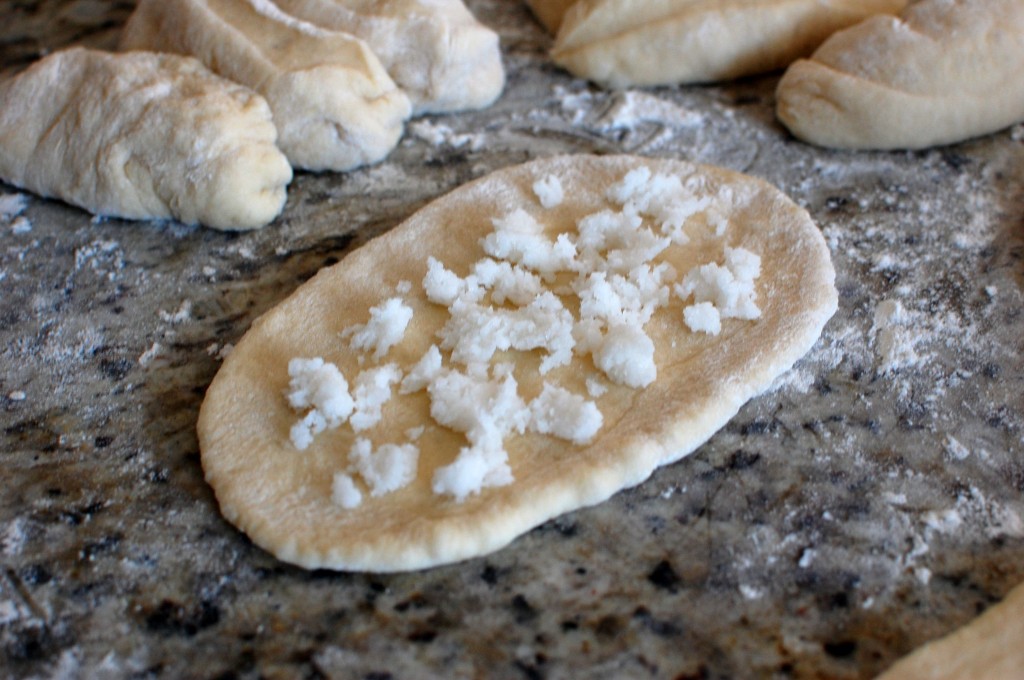
4. Divide the dough into 9 even pieces. Roll each piece out into an oval. Fill each oval with 1/9 of the coconut mixture, spread the coconut mixture out over the dough oval.
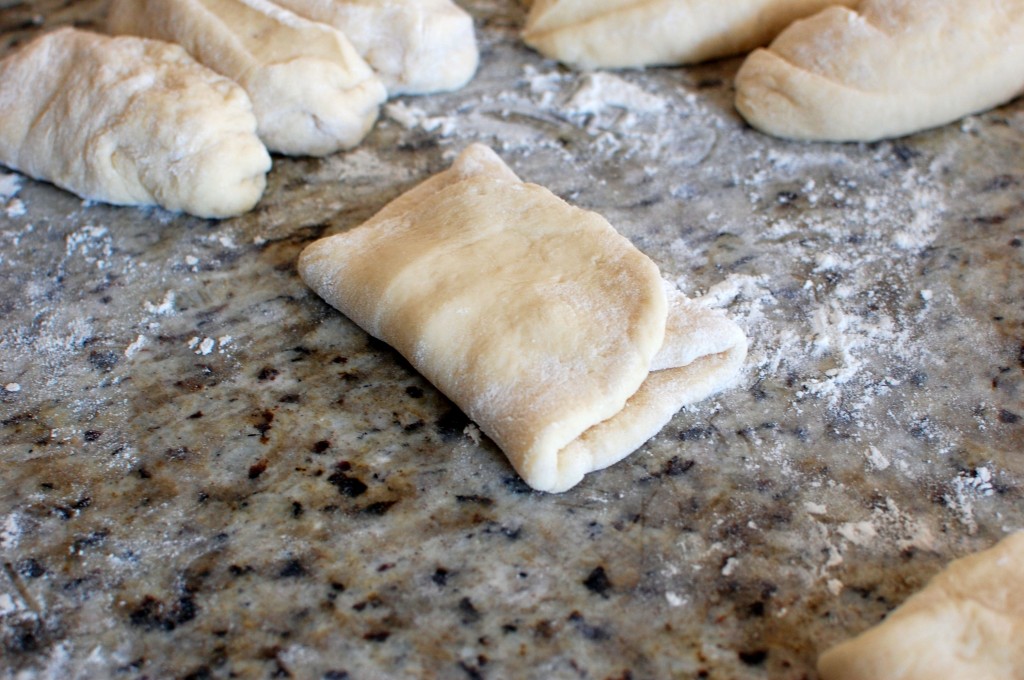
5. Fold the long ends of the oval inward in thirds, to cover the coconut mixture.
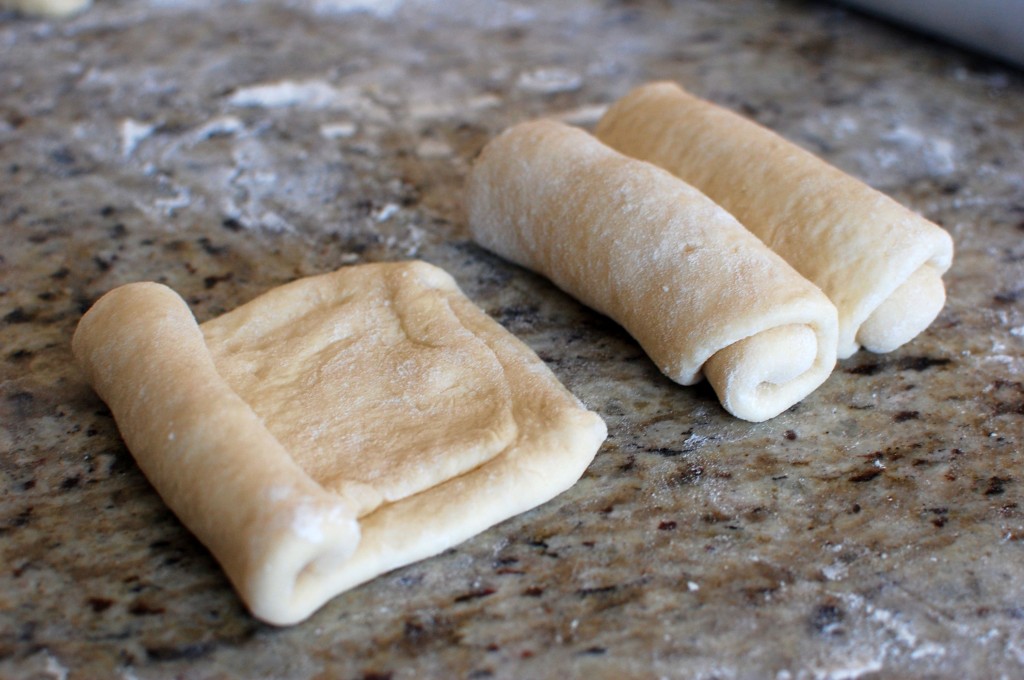
6. Turn the folded dough over, and roll into a rectangle with a rolling pin. Flip over, and roll the long end up to form a cylinder. Set aside and repeat for the remaining dough.
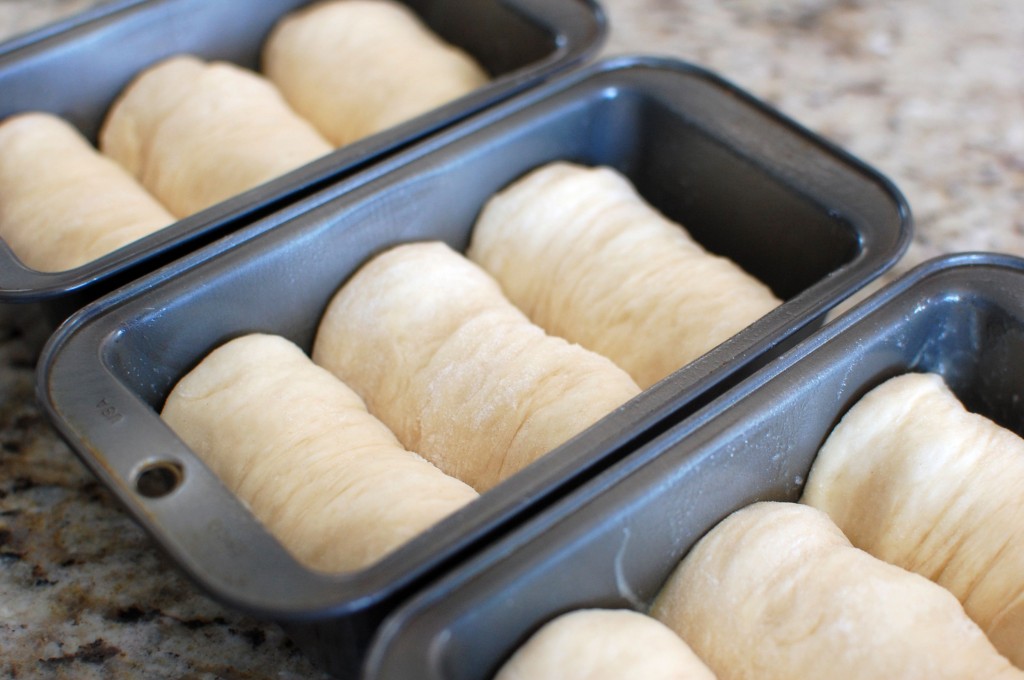
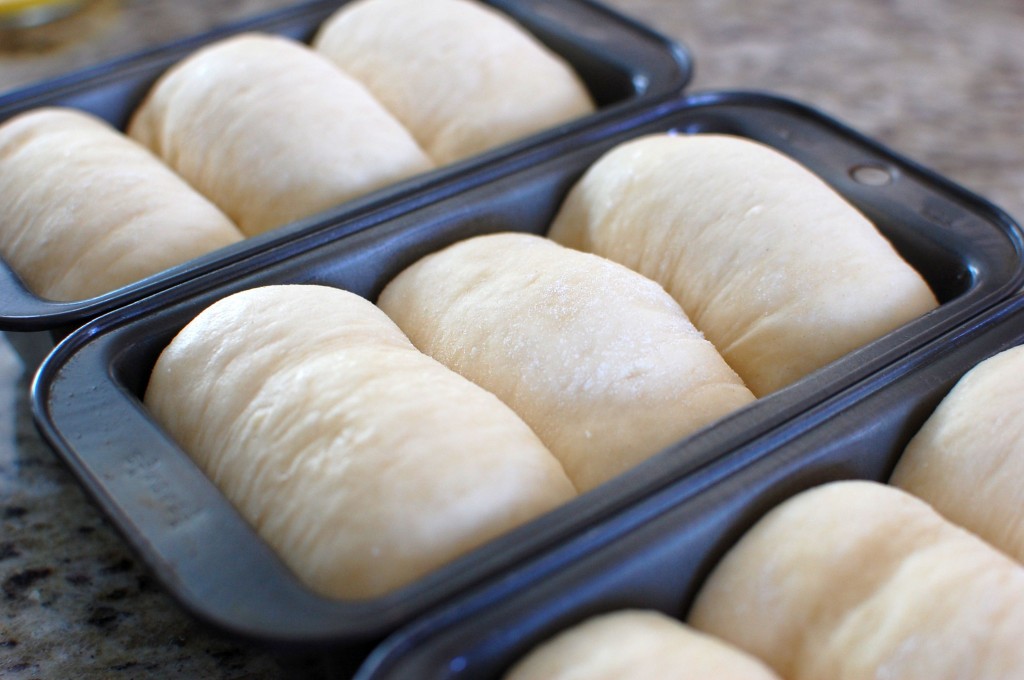
7. Grease three mini loaf pans. Squash the dough rolls lengthwise (to make them shorter and fatter), and place three (seam side down) into the mini loaf pans.
8. Cover loosely with plastic wrap, and let rise again for an hour in a warm place.
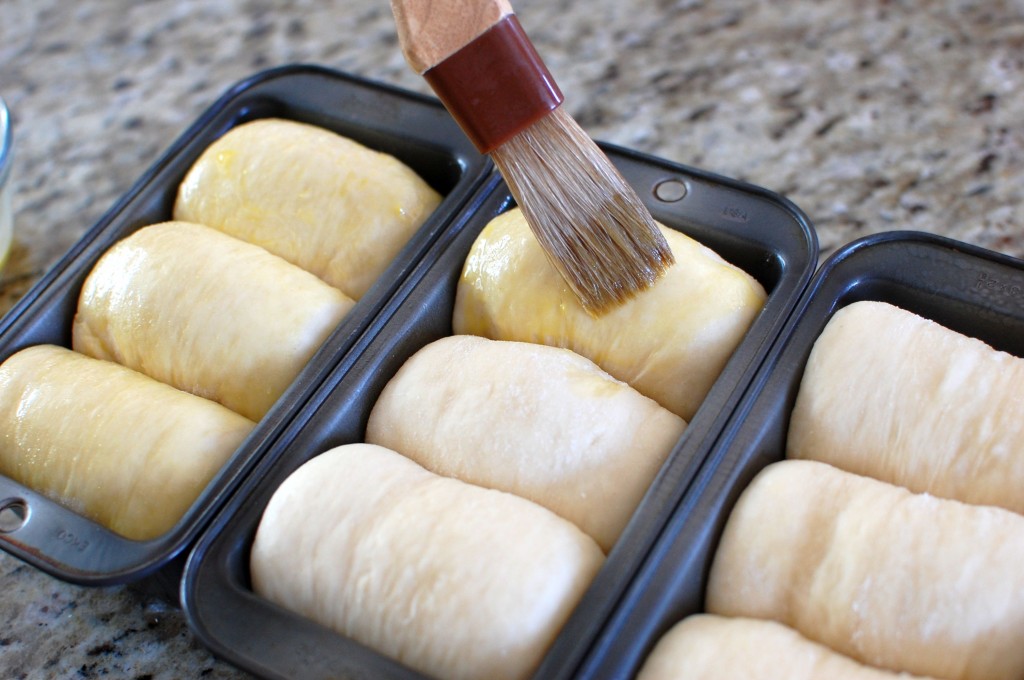
9. Brush the tops of the dough with eggwash. Bake in a 335 degree oven for 22 minutes for three smaller loaves. (If you want to make one big loaf instead, in a regular loaf pan, divide the dough into 4 ovals (instead of 9) and bake for 30-35 minutes.)
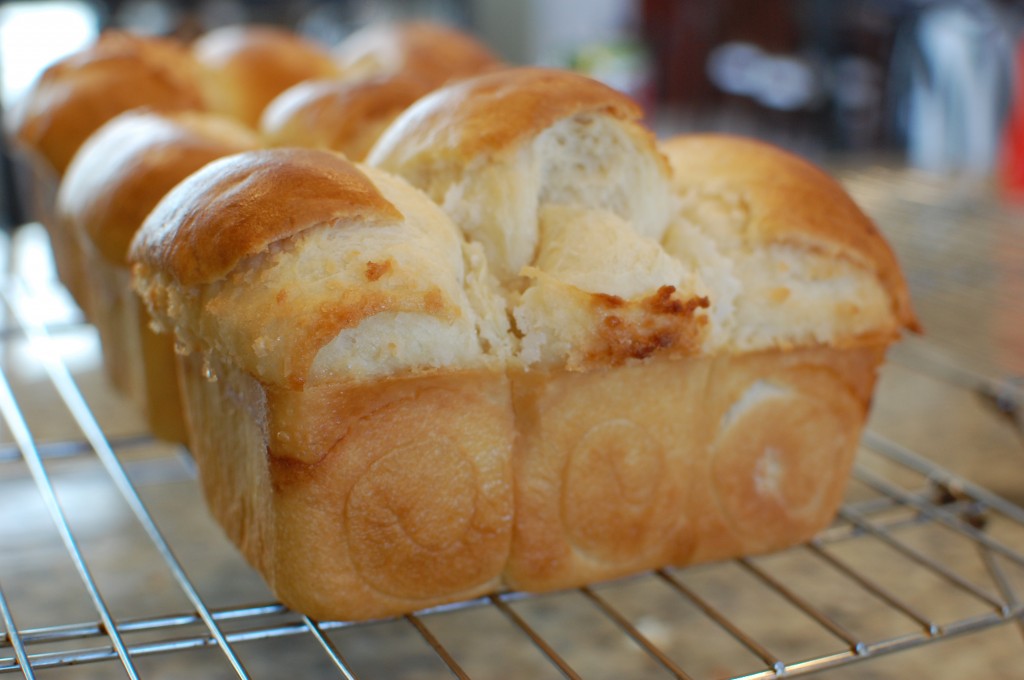
10. After removing from the oven, let cool for 5 minutes. Then remove the loaves from the pan, and allow to cool on a wire rack.



Love coconut buns and happy to see this recipe. Hmmm, will try baking in bread machine though.
I like to bake the bread in the oven… it doesn’t need long (I use the bread machine just to mix and knead the dough for me). Sometimes when you use the bread machine to bake the bread, it turns out with a really hard crust – and it doesn’t have the softness you expect from milk bread or coconut buns. But let me know how it turns out!
Do I need a food processor or a bread machine to make this or am I able to make it with my hands?
Victoria,
I think it is easiest to make this using a bread machine because the machine will do the mixing, kneading, and rising for you. However, you can make this by hand or with a dough-hook attachment on a stand mixer. I don’t think a food processor will work.
To make with a stand mixer, you will want to knead the dough for 10-15 minutes (check it every few minutes) until you can stretch the dough to form a “windowpane” (thin membrane of dough.. without ripping). You can also knead this by hand… which will probably take closer to 15 minutes. Then allow your dough to rise (covered) in a warm location for about 45 minutes. Then, punch down, and allow to rise another 30-45 minutes.
Let me know how it turns out!
Thank u so much!!! The recipe was easy and delicious! My family loved the bread!
Can the dough be refrigerate overnight for the first rise and then let it rise the second time at room temperature before baking? Just wonder if the texture would be the same
Amy,
Yes, you can refrigerate the dough. I would let it rise the first time though… Then punch down before refrigerating. Then bring to room temperature and let rise the second time before shaping your loaves.
Where is a good place to get loaf pans?
Tiffany,
It depends on what kind of loaf pan you are looking for. Target sells reasonably priced 9 X 5″ loaf pans if you are looking for something basic. I look for baking pans that are lighter in color (like a shiny silver – not a dark gray color)… if you buy a baking pan that is darker, your final product will sometimes end up burned on the outside (I learned this the hard way). I also prefer those pans that have a non-stick surface – they definitely still stick if you don’t use baking spray (Pam with flour added)… but I find them also easier to clean. Look for something with some weight to it – if the pan is too flimsy, it won’t hold up… and you will find that your cakes don’t bake as evenly.
Wilton makes a pretty good mini loaf pan set (3 mini loaves = 1 regular loaf): Wilton Recipe Right 3 Piece Mini Loaf Pan Set
Wilton also makes a pretty good regular sized loaf pan: Wilton Recipe Right Large Loaf Pan
Hope this helps!
Hi Mika
Is there any trick as to how to shape the rolls for them to look evenly and fit in the pan ( like your dough)? Do you measure/weight them or just eyeball? My rolls (after shaping) , one tends to be shorter, longer or bigger than the other. They still taste good just not as pretty looking as yours
Hi Amy,
I usually just eyeball it. It would be more accurate to weigh the entire dough… then divide by 9 to get the final weight of each section…. but that’s too much work for me! I usually just pat the dough into a rough (even) log, then use a knife and cut into 3. Then I take each section and pat it into smaller (even) logs… then cut those into 3.
When shaping the dough… if I end up with one piece that seems a little bit bigger than the other, I stick that one in the center of the baking pan and leave the smaller ones on the sides (so at least when the middle bakes up taller, it looks like I meant to do that…
Is it okay to use all purpose flour instead of bread flour?
Hi Doris,
Yes, you can use all purpose flour… but it will turn out better if you use bread flour.
Bread flour has more protein, so you get more of that stretchy bread-like quality to your result (because more gluten will develop). King Arthur brand all-purpose flour has a higher protein content and will probably work out better than your average supermarket brands. Also, if you have a little bit of “vital wheat gluten” – you can add a little bit to your all purpose flour to make the result better too.
I tried it today with all purpose flour, tasted amazing!
Next time will try to get my hands on some bread flour.
Thanks for the recipe
Glad it worked out!
This recipe was amazing! I didn’t have coconut milk on hand, so I just used normal skim milk; and I also didn’t have any salt so I omitted that altogether and it still turned out amazing! Oh, and since I’m not such a fan of super sweet breads, I omitted the sugar in the filling mixture. Perfect! I have a mini-loaf pan that makes 8 small loaves at once, so I just divided the dough into 8 equal-ish parts and placed one filled roll per mini-loaf and followed the temp/time instructions for the smaller loaf pans. They turned out so good! Coconut is one of my favourite flavours so anytime I can incorporate it, I do. I think next time I’ll toast the coconut flakes to give it a bit of a crunch. I wonder if you incorporate the filling mixture into the dough, and fill it with red bean paste, if that would work? Or maybe it would be too mushy? I’d try it, but I’m afraid the end result would open an awesome flavour vortex and end everything. I don’t want to be responsible for that
Thanks again for another excellent recipe!
Hi Veronica,
Thanks for the feedback – I’m glad it worked out for you. This recipe is based on my Japanese Milk Bread recipe… which uses regular milk instead of coconut milk… so substituting with regular milk is no problem. I do like to use coconut milk instead since it brings out more of the coconut flavor… but it’s not absolutely necessary. You do not need to add sugar to the filling if you don’t want to – I like to, since it adds a subtle sweetness to the final loaf – overall this is not a super sweet recipe as it is, so I like it that way. However- it’s all up to your own taste – so feel free to add more or less sugar depending on what you like. As for mixing the filling into the dough – I probably wouldn’t do that because it might throw off the balance of the dough and make it too dry… but you can try it.
Made it last week, absolutely delicious, mom is craving for more already! Though when I made it, had a small problem with the dough being too soft and sticky when I took it out of the bread machine. And when I rolled it with the dough pieces, there were air pockets that popped. I don’t know if it’s because of the yeast or something else? I have to admit I wasn’t sure how to add the active dry yeast to the mixture… I proofed it, and it happened to be a lot of liquids… So I only scooped up around 3 tsps of the “bubbles” ontop of the yeast water.
Dear Helen,
Baking is more of a science than an art… so if any one of the components changes, then you can change the balance of the recipe. Sometimes that works, but sometimes it doesn’t. In this case, by proofing the yeast, you changed two components of the recipe: liquid ratio and time. My recipe does not call for yeast proofing; you add the dry yeast directly to the ingredients for mixing the dough. When you proofed the yeast in the extra liquid, you then added too much moisture to the dough, making the resulting dough too soft and sticky. Also, by proofing the yeast, you gave the yeast a head start in the CO2 (Carbon Dioxide) formation, so that they produced way too much gas by the time you were finished. To improve your results next time, do NOT proof the yeast, and make sure your rise times are 1 hour exactly (or slightly less). Hope this helps!
You should make more TAIWANESE recipes please! Like snacks and stuff Do you know any other recipe sites for Taiwanese recipes?? This is really tasty.
I’m interested in trying this recipe, but I was wondering–what is your weight-per-cup for bread flour? I would normally assume 128 grams. Thanks!
I’m sorry – I don’t know. I don’t usually weigh the flour, I measure volumetrically.
This bread is AMAZING. I didn’t have sweetened coconut shreds at home so I made a quick red bead paste using canned kidney beans and sugar, and used that as the filling instead. My whole family is in love with this bread! I think we’ve eaten half the loaf already…
By the way, I’ve made many of your recipes (several Chinese dishes, this bread, and your Cream Pan) and they have always turned out FABULOUS. I haven’t ordered takeout in months because my family prefers your Chinese food recipes! You’ve got a great site–thanks for all the great inspiration!
Thank you, Stacy!
Hi Mika,
I wanted to let you know I tried out your recipe and it was amazing. I used the bread recipe and replaced the filling with taro paste! It was a big hit! I posted the adapted recipe onto my blog! Please check it out
http://alittletwistofgoodness.blogspot.com/2014/03/taro-paste-filled-coconut-milk-bread.html
Taro paste sounds like a delicious alternative. Your pictures look wonderful!
Hi mika,
Thank you for this fabulous recipe! I have made them yesterday and it taste awesome!
I do have a question for you…. Do you have to shape the dough after the first punch?
Thank you in advance,
Tini
Are you making the bread dough by hand? In the bread machine, the dough goes through the first punch step with a second rise. So if making by hand, you would want to allow the dough to rise, punch down, then you can let the dough rest maybe 15 minutes before shaping. Then allow a second rise before baking.
Hi Mika,
Thank you so much for the clarification. This is such a wonderful bread. I am making 2 batches today! My hubby love it so much and my daughter love the chocolate filling version. Thank you!!!!!!!
Using chocolate chips instead of the coconut filling is a wonderful variation!
This was good! I’ve been looking for this type of bread. Thank you for sharing. I am in the process of baking more.
Thanks!
They are so so so good. I made some with coconut and sone with coconut and peanut. Possibilities are endless. Thank you so very much for the great recipe. Will try Hawaiian bread next
You’re welcome!
This recipe looks amazing! I have never had bread like this before, but the concept sounds wonderful! I am not a fan of coconut flakes so I think I would make one loaf without.
This recipe is awesome! I am in the process of making this bread for the 3rd time. Thank you for sharing.
Hi Mika, It was your recipe that made me excited to give it a try! I convinced my hubby to buy me a bread maker (it really took no effort actually, he likes the idea of fresh baked bread) a couple days ago. I bought the coconut ingredients, but overlooked the minor detail of sweetened coconut flakes. I bought regular coconut flakes. Any suggestions on how I can modify the unsweetened coconut flakes? I’m thinking maybe powdered sugar?
Just add sugar to taste. You can make the filling sweeter by adding a few spoonfuls of sugar!
Thanks, Mika. One last question: Does the coconut oil need to be heated to liquid consistency before putting it in the bread maker? Thanks in advance!
No, it does not… just put it in solid.
When you use the bread machine, what size loaf do you set the machine for? My machine has options for 1,1.5, and 2lb loaf.
Thanks
I never bake this dough in the machine – I just use the “make dough” setting only which doesn’t require setting a loaf size. My machine is a 2lb loaf machine.
Oh oops. thank you!! I’ve never used the dough setting yet. Can’t wait to try this. Cheers!
I love, love this bread, Mika!! Thank you from the bottom of my heart, (for doing the hard work for us in developing these wonderful recipes)
You’re welcome!
Hi, I love coconut bread ever since I had from this one Chinese bakery and never found the same coconut bread again. I am definitely excited to try this. What I would like to know is if the inside of the bread is super soft and kind of dense. I’m not sure if that makes sense but I love that soft texture and sweetness inside of the coconut bread. Also the bread that I had, had a sticky texture on the outside I believe. Is there a way to achieve that?
This is a yeast bread, so if made correctly, it should be soft and fluffy (light and airy) on the inside – not dense like a loaf of banana bread or like pound cake. As for having a stickiness to the outside – mine does not have that, but you might be able to achieve that with a light wash of corn syrup or honey on the surface of the dough before baking.
I have searched everywhere for a recipe like this! The bread I am trying to duplicate from a Chinese Bakery in Cleveland is simply called Creamy Milk Loaf and instead of the coconut filling, it’s a filling make with condensed milk. I can’t wait to try this recipe and experiment to try to make my (what I like to call) “crack bread.” Any ideas/suggestions for the condensed milk filling?
I’m not sure… that sounds really good (but I’ve never had anything like that before). You can try using a small amount of sweetened condensed milk instead of the coconut filling and see how that turns out – but that’s just a guess… maybe try it, then go from there depending on your results.
Hi mika, I made these buns and perfect recipe thank you, delicious, will be making again, thank you again for all your hard work on making these perfect,
Hopefully you are able to answer this question despite the post being from a while ago.
I was wondering if the tang zhong measurements that you have for this recipe yields to 1/2 cup of tongzong?
I attempted to make this with my bread maker yesterday but after it was done in the bread maker, the dough was super duper sticky and I didn’t understand why. I used the exact same measurements and ingredients that you had listed. The only thing I didn’t measure was the tongzong. I assumed the (1/3 cup bread flour and 1 cup water) would yield 1/2 cup tongzong.
I am going to try again this weekend so hopefully you reply.
Thanks!
The reason why I gave the precise measurement of 1/2 c. tang zhong is because you really do need to measure it. The recipe for tang zhong will typically yield 1 c. So if you don’t measure it, you will end up with double the amount which will throw off the recipe.
In general, when you read a recipe and it directs you to add a specific amount of an ingredient, it is best to measure… remember someone put the measurement there for a reason! The cooking process for the tangzhong can yield different volumes… so please measure.
I made this the following day with measuring the tongzhong and it turned out amazing!
It was a good lesson learned.
My friends saw the bread sitting on the counter and asked to try. They were amazing at how good of a baker I am (which I am totally not) and really enjoyed the bread. Thanks for the recipe!
Great!
Tried a bread similar to this from a Vietnamese bakery in Mesa, AZ. Tried your recipe. It tastes amazing!! In their bread, the filling was yellow & had what tasted like raisins (about 6 per loaf). I was going to make 1 large loaf, ended up putting 3 rolls in the pan and the fourth, I cut into 3 & put in a small pan. Mid way through baking, one of the rolls from the big loaf popped out of the pan. Put it into another pan to finish baking. It rose so much that next time I’ll have to adjust the pan. LOVE this bread!!! Next time I’ll make a double batch. My bread machine is my savior for dough, otherwise I can’t make yeast breads. Thx again for sharing this recipe!!!
You’re welcome! I’m not sure what kind of bread you had… but the yellow filling sounds like sweetened mung bean paste?