
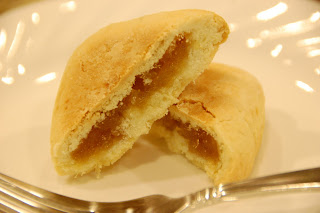
 A few years back, my husband’s aunt came to visit from Taiwan and brought us some wonderful Pineapple Cakes from a famous bakery in Taipei. Apparently, people stand in long lines to buy these specific pineapple “cakes” (pineapple jam filled shortbread) – and after tasting them, I understand why! Not too long ago, I saw a box of Taiwanese Pineapple Cakes at the Asian Market. I was really excited to find them in the U.S. – but sadly, these pineapple cakes were grossly inferior to the Taipei bakery version. Here is my version of Taiwanese Pineapple Cake – a very close copy to the original bakery version (it makes about 20 individual cakes).
Update 9/8/2012: I recently returned from a trip to Taiwan. In Taipei, I

Different varieties of pineapple cakes at the Nei Hu Bakery in Taipei
finally had a chance to visit the Nei Hu Bakery… home of the VERY BEST Pineapple Cake in all of Taiwan. Seriously, no other brand of pineapple cake I have ever tried has lived up to this gold standard. I think part of the reason why, is that their recipe is made with actual pineapple, while most of the other brands use winter melon as the “pineapple” ingredient – which in my opinion, is quite inferior.
And now, they have created many new flavors of pineapple cake… melon, strawberry, coffee, green tea, lotus, peanut, and pineapple with salty egg! My favorite remains the pure pineapple cake. But my husband is a big fan of the pineapple cake with salty egg, and the melon flavor.

Store owners of the Nei Hu Bakery - the son (in the middle) & dad (on the right) bake everything themselves!
While there, we had a chance to meet the owners of the Nei Hu Bakery (see photo to left). This bakery is family owned and operated, and the father and son are responsible for baking all of the pineapple cakes they sell, using their secret family recipe. I would post their address… but I can’t find an English version of the address! Here is their phone number in Taiwan (which is listed in English on the packaging and on their bag): TEL: 27992922.27988363
If you have a chance to visit Taipei… this bakery’s pineapple cakes are not to be missed!
Taiwanese Pineapple Cakes: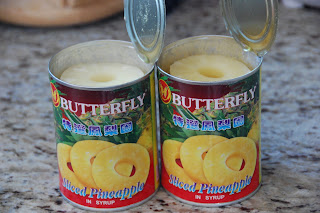
Filling
- Two 20 oz. cans sliced pineapple
- 3/4 c. sugar
- 1/4 c. brown sugar
- 1/2 tsp. lemon juice
- 1/2 tsp cornstarch + 1/2 tsp. water
Dough
- 1/2 c. unsalted butter
- 1/4 c. butter flavored shortening
- 1/2 c. powdered sugar
- 1 egg + 1 egg yolk
- 1 3/4 c. cake flour (about 300 grams or 10.6 oz. by weight)
- 1/2 tsp. salt
- 2 T. heavy cream
- 1/4 tsp baking soda
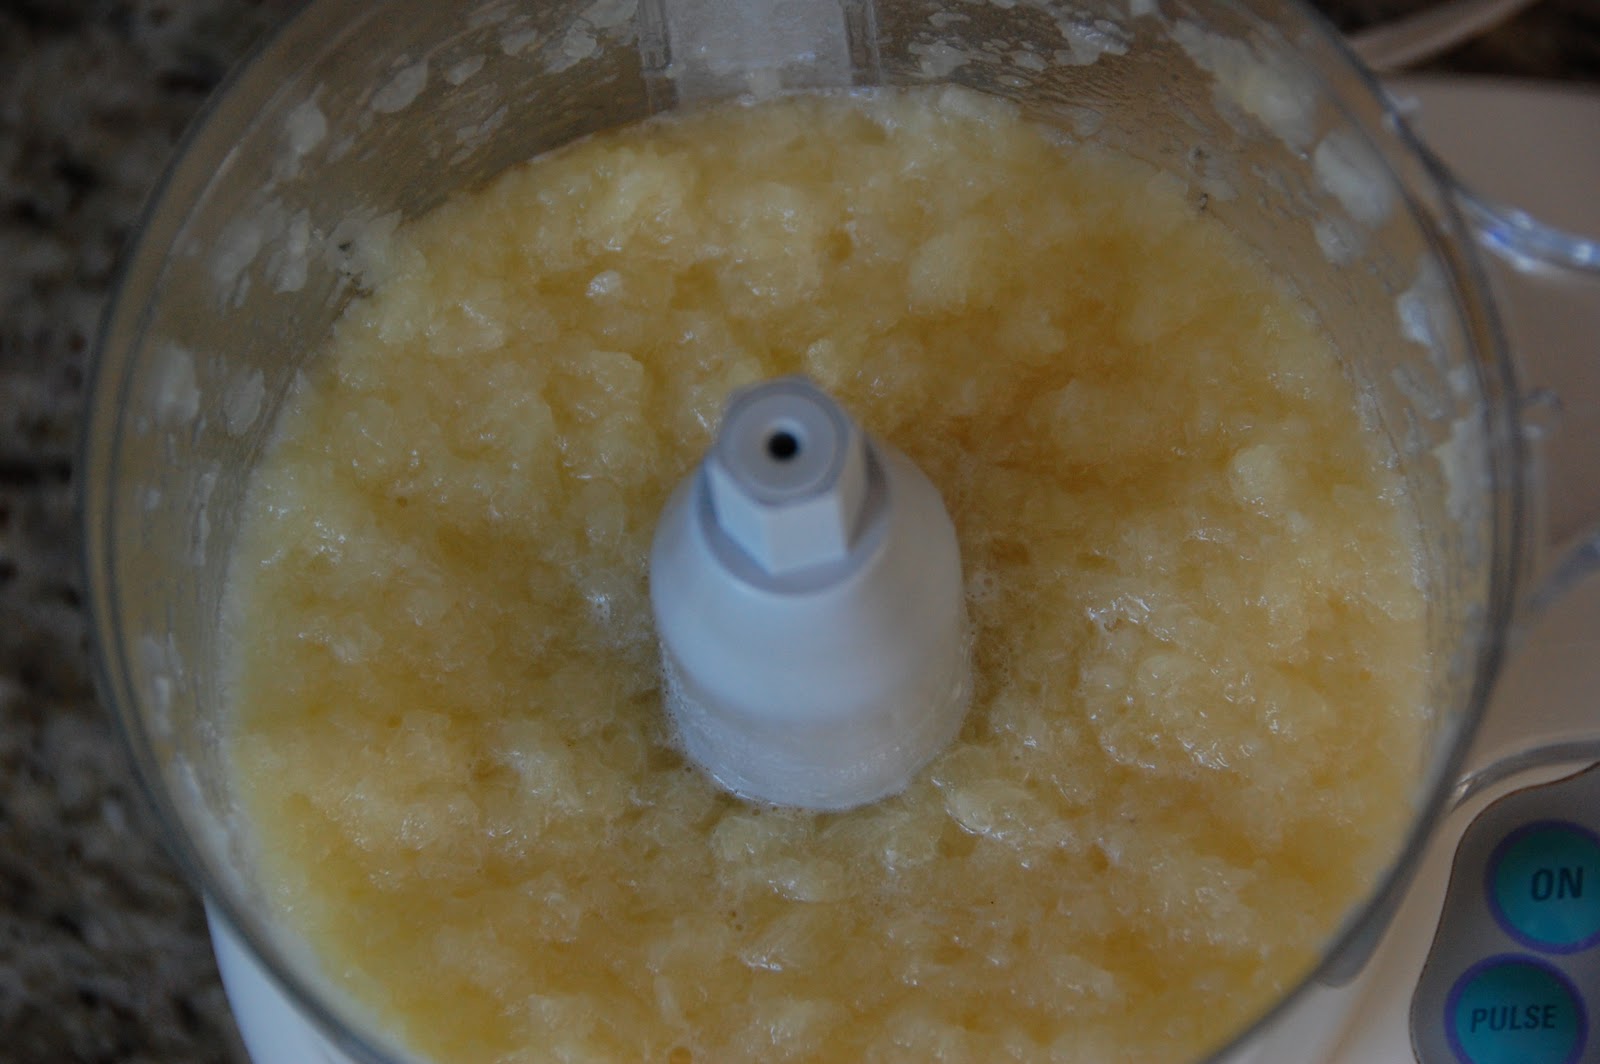
1. Make the filling: Drain the juice from the pineapple slices. Put the drained slices into a food processor and pulse until the texture of apple sauce.
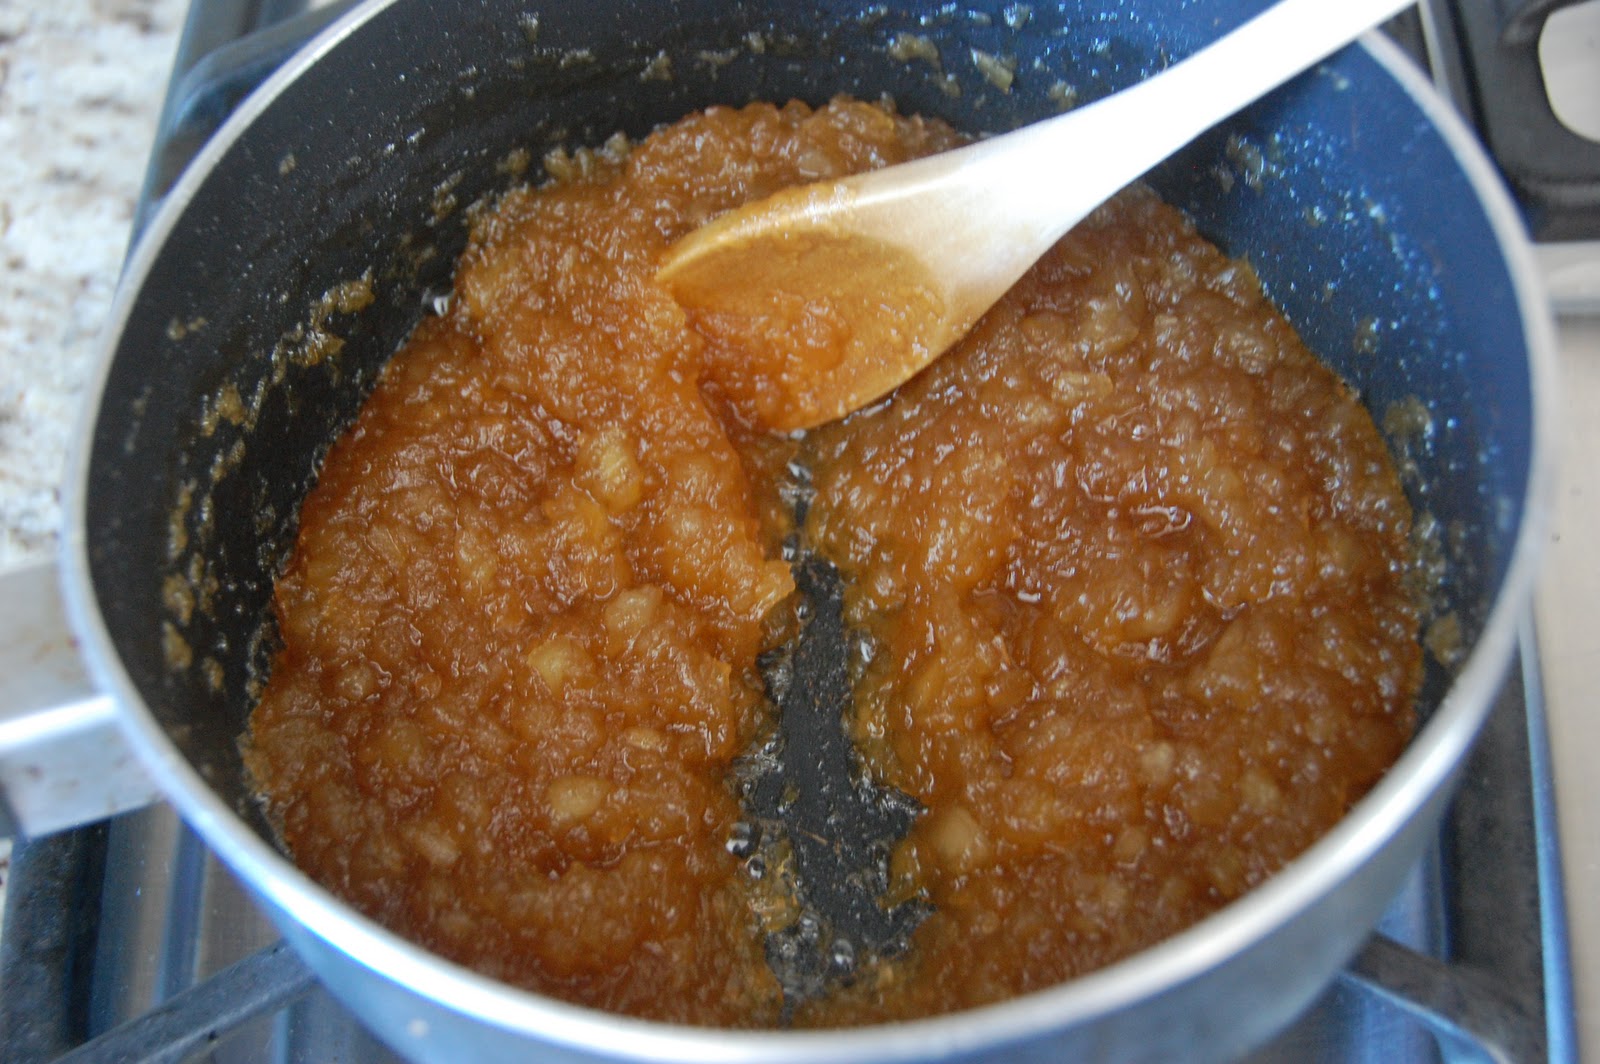
2. Dump the pineapple into a sauce pan, add the sugar, brown sugar, and lemon juice. Cook for about 20 minutes on medium to medium high heat, until the mixture starts to get thick.
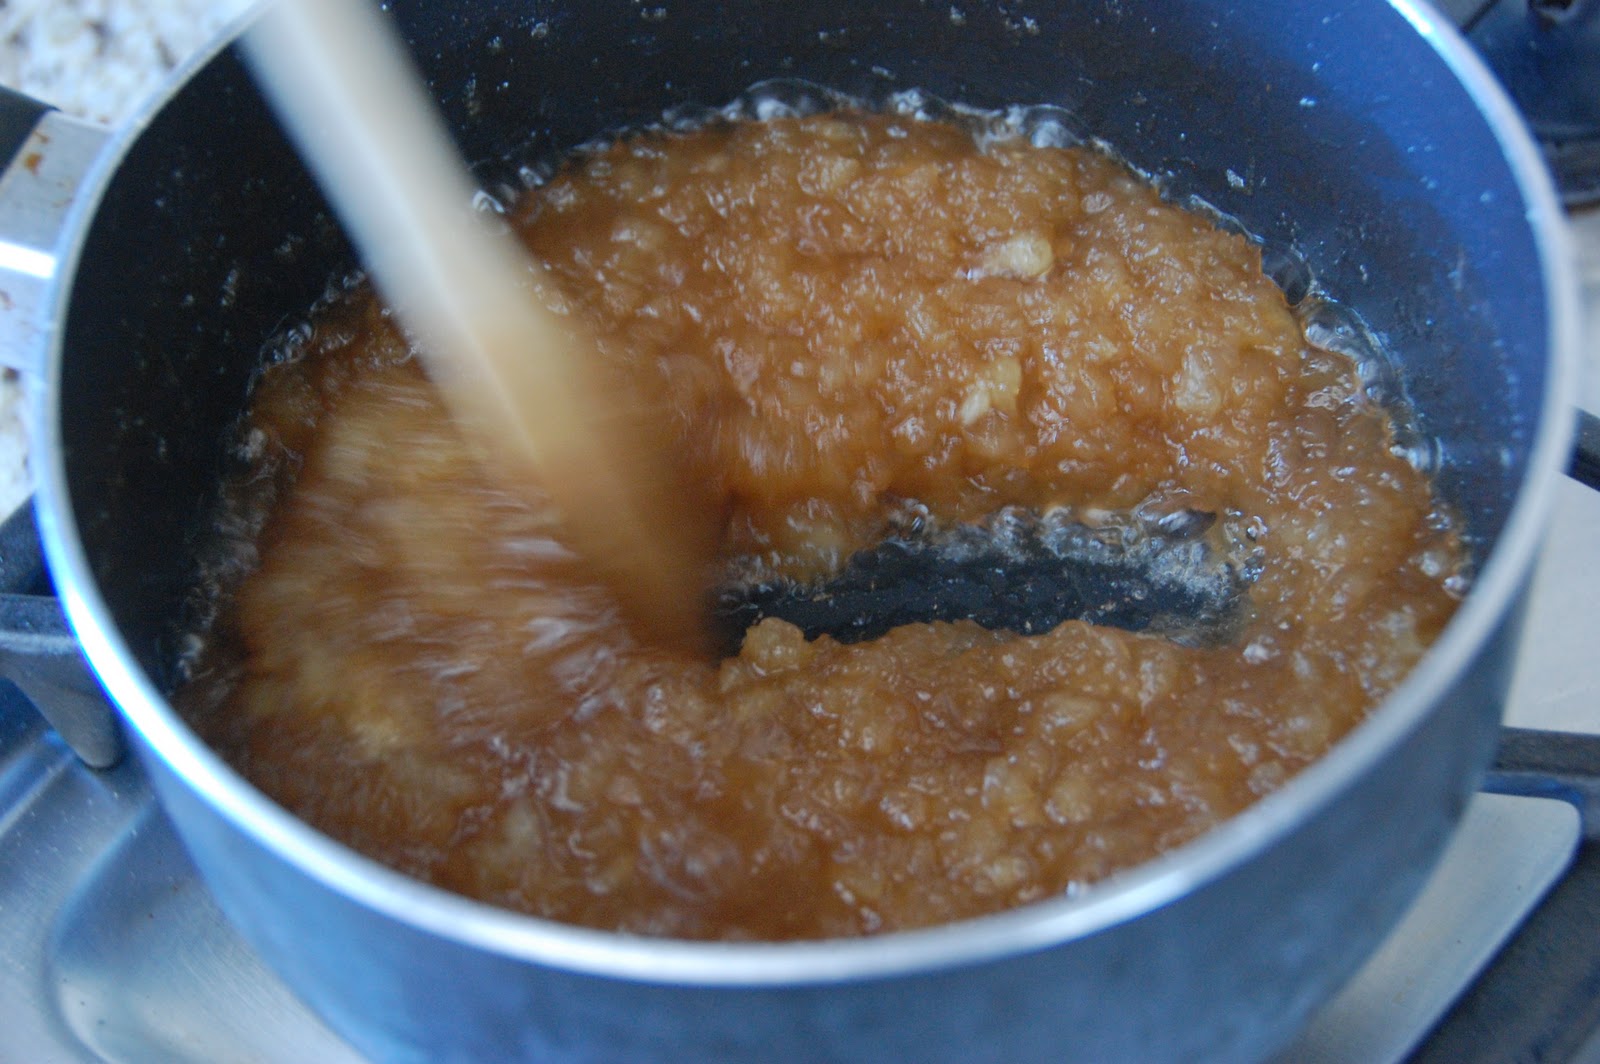
3. Combine the cornstarch and water, and add to the pineapple mixture. Cook another 5 minutes until very thick, and the mixture is a thick paste. Allow the filling to cool completely.
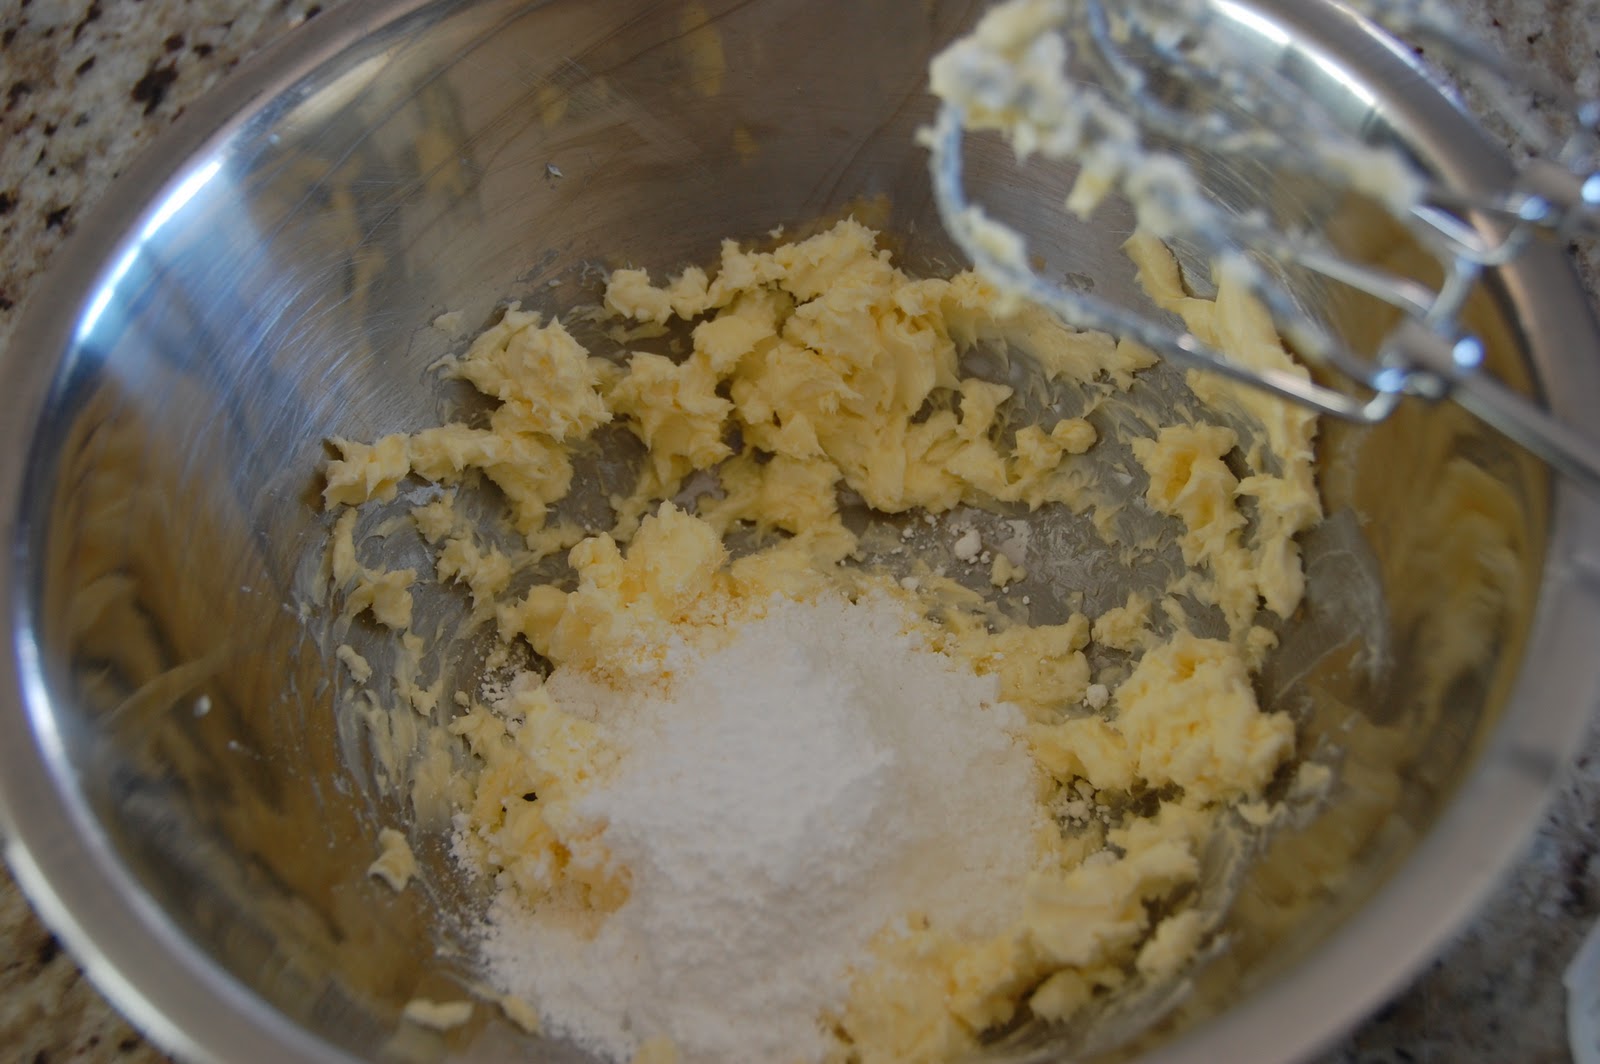
4. Make the dough. Cream the butter, shortening, and powdered sugar until light and fluffy (scraping down the sides of the bowl when needed).
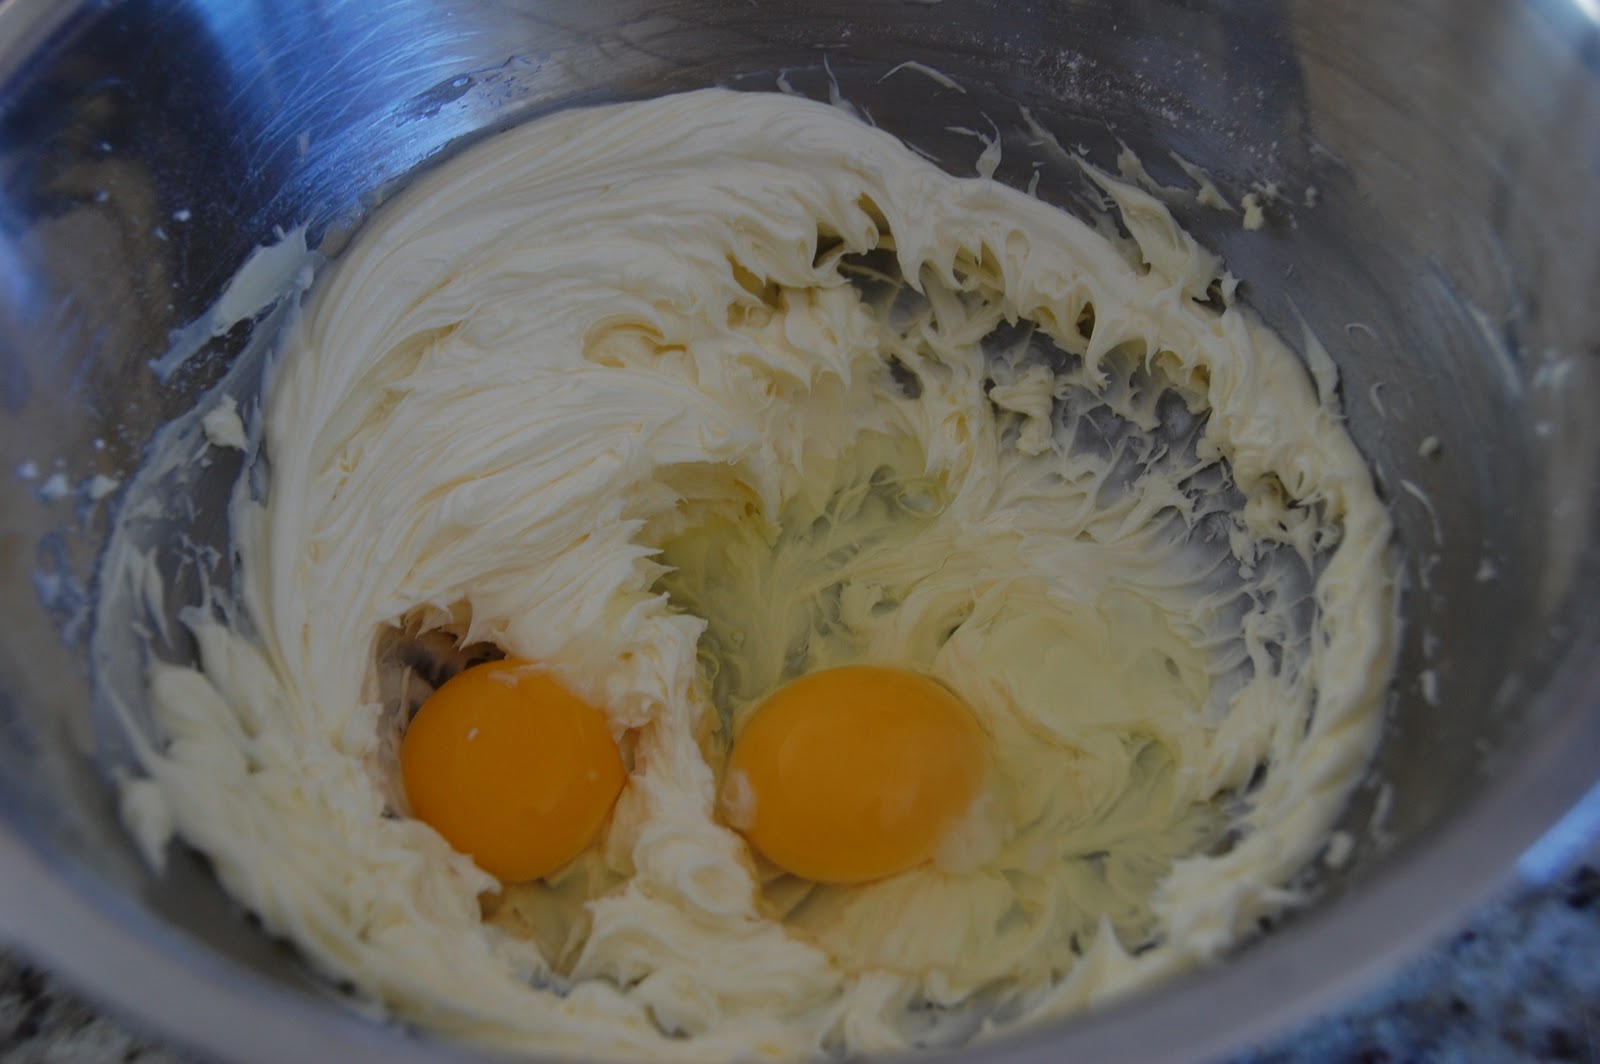
5. Add the egg and egg yolk, and mix until thoroughly incorporated.
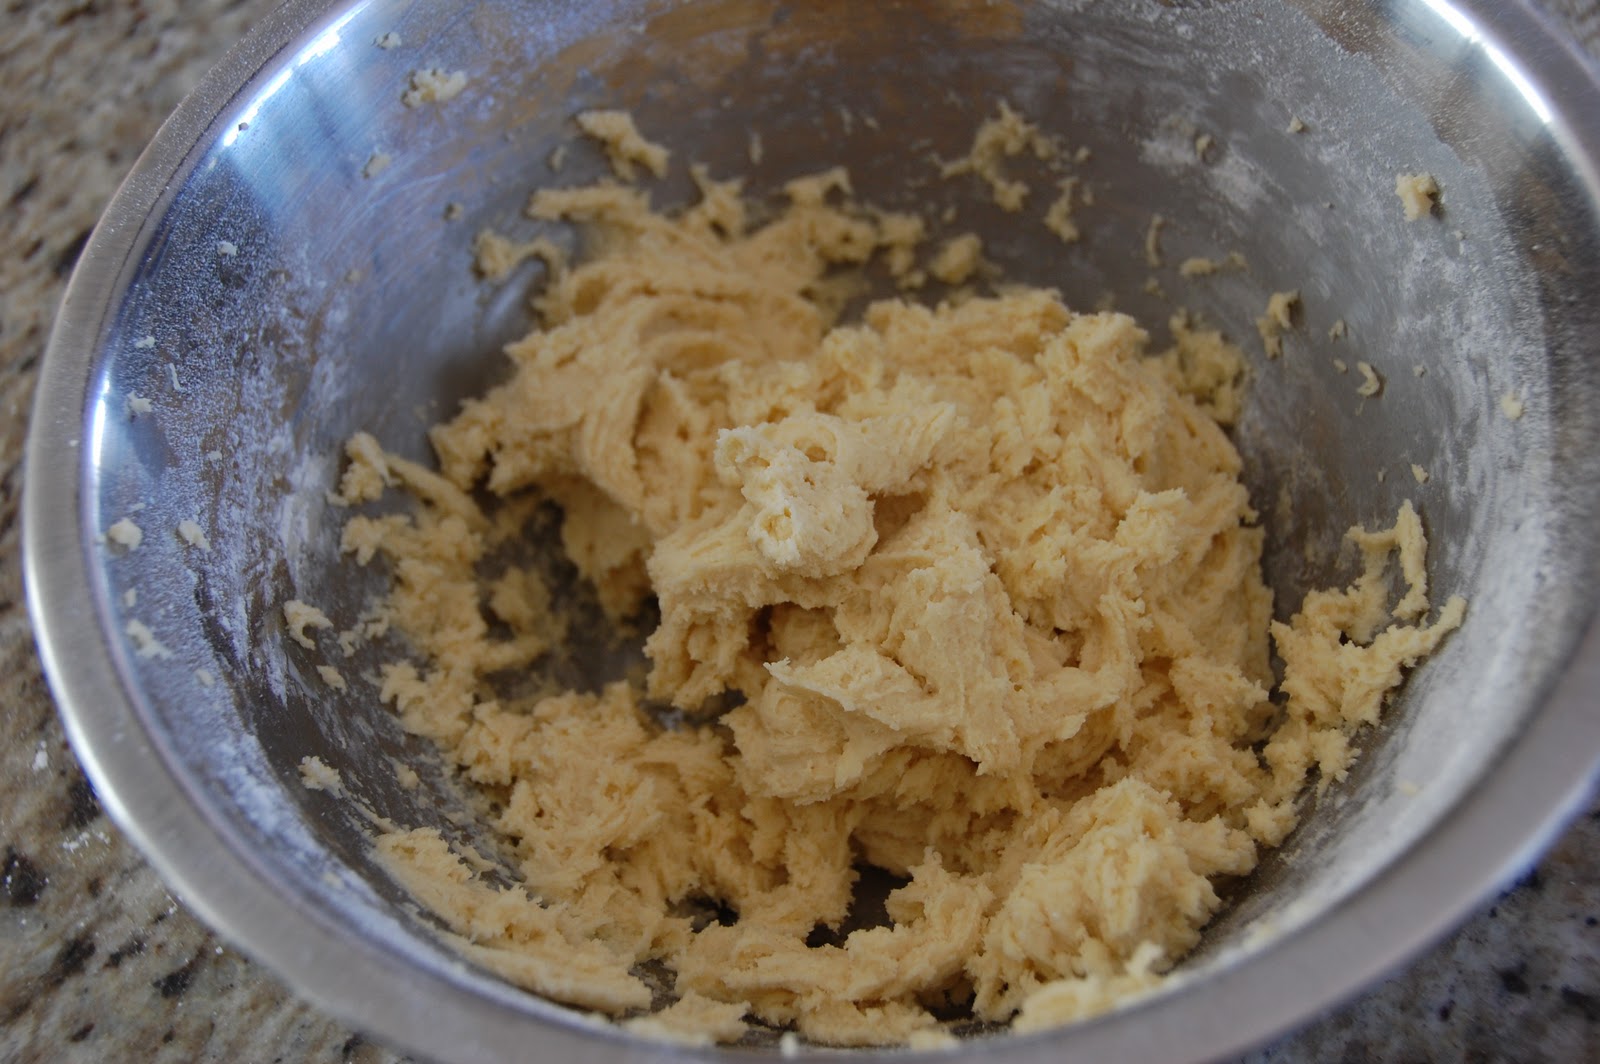
6. Add the flour, baking soda, and salt until just combined. Last, mix in the cream until you have a soft uniform dough. (The dough will be sticky.)
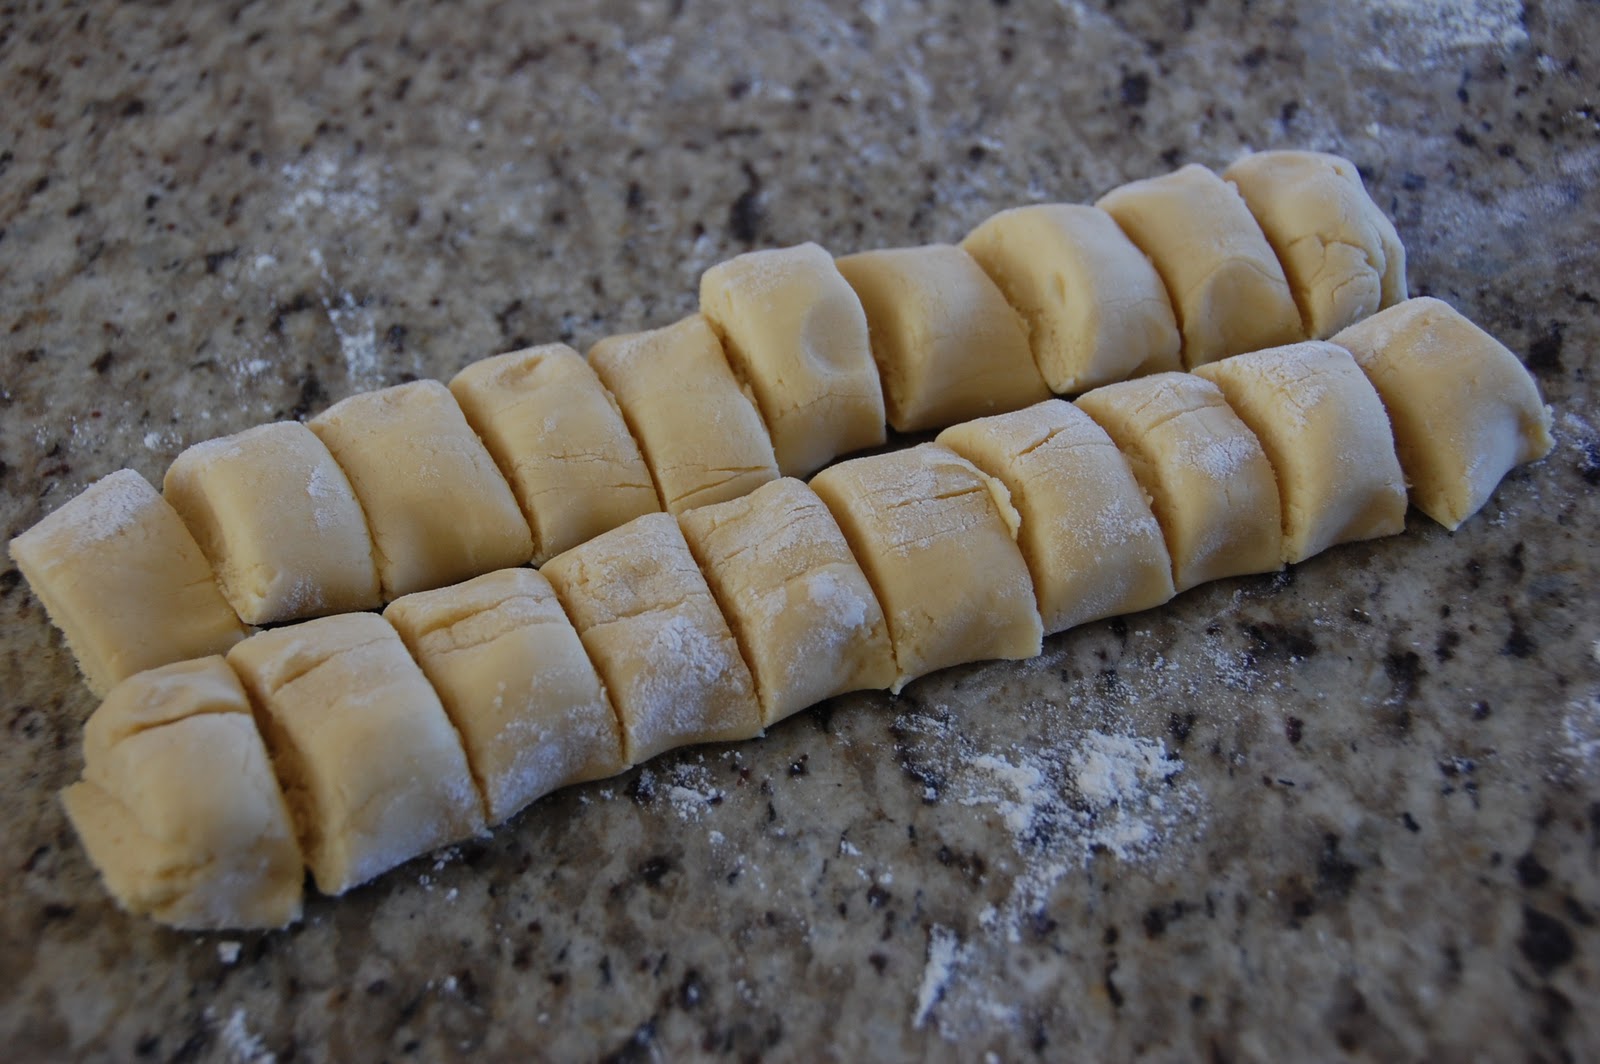
7. Preheat the oven to 350 degrees. Roll the dough into a log and divide into about 20 pieces.
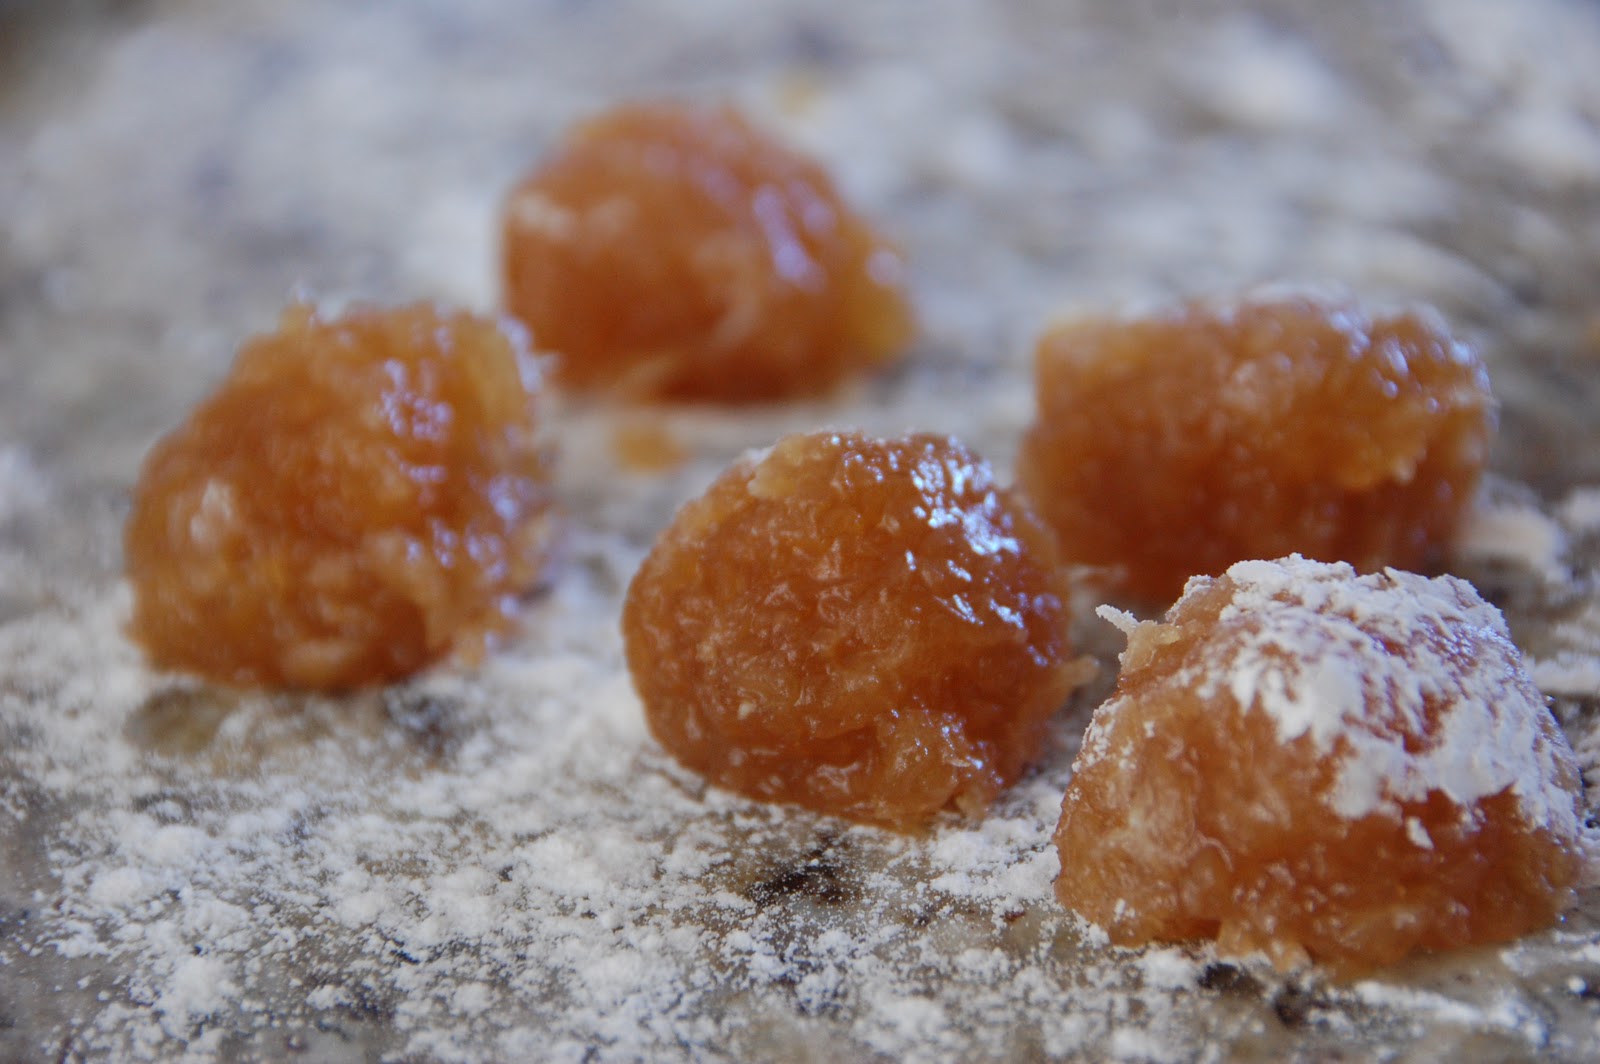
8. Portion out the cooled pineapple filling into about 20 balls.
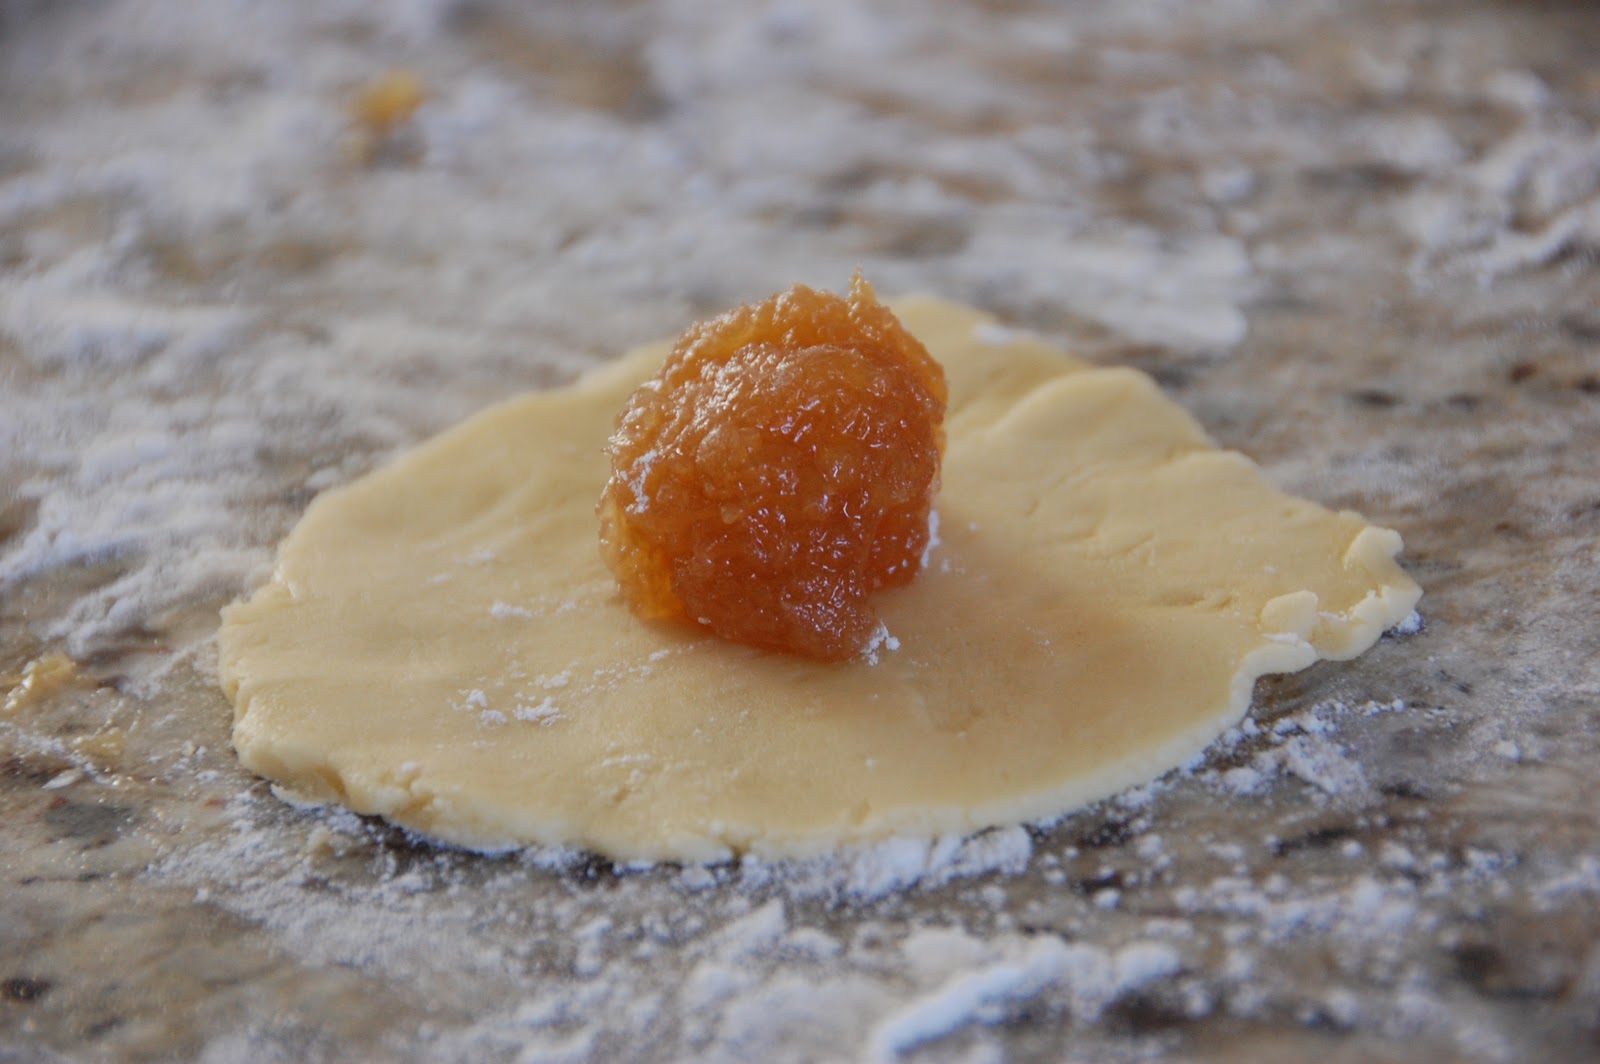
9. Flatten each dough portion (either with the palms of your hands, or with a small rolling pin). Place one portion of pineapple filling into the center of each flattened dough circle, and fold the edges up.
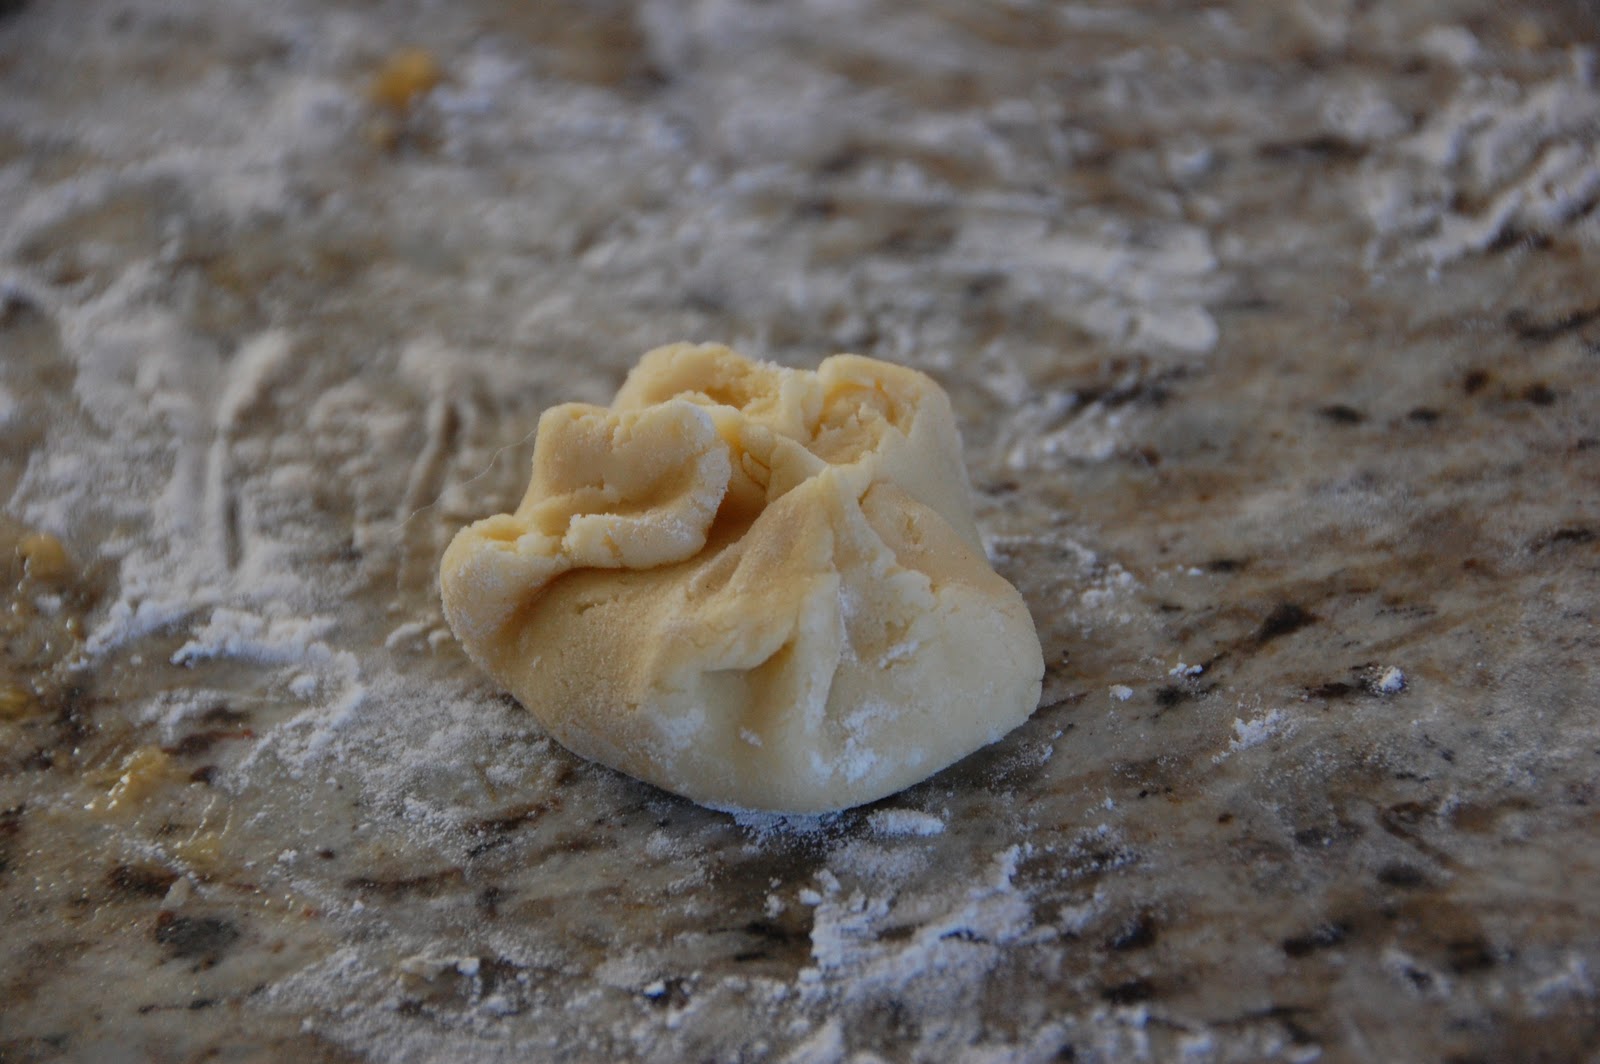
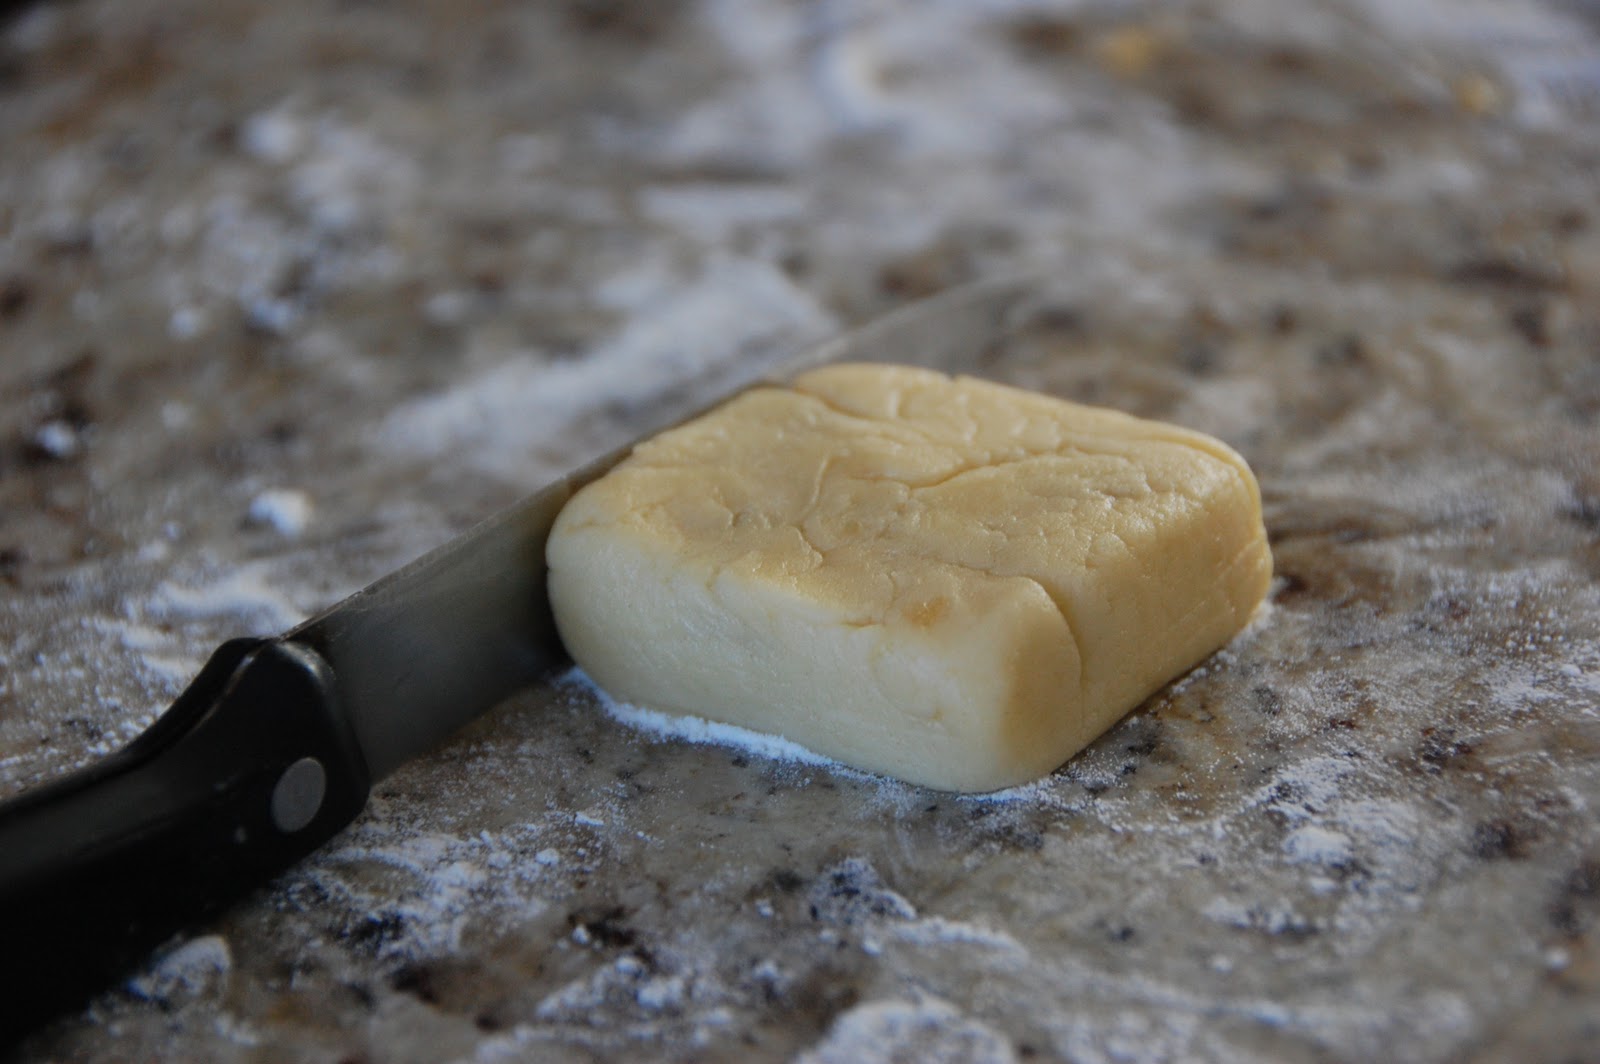
10. Pinch off the edges, and flatten the filled ball. Use the flat edge of a knife to square the edges of the filled dough ball into a square.
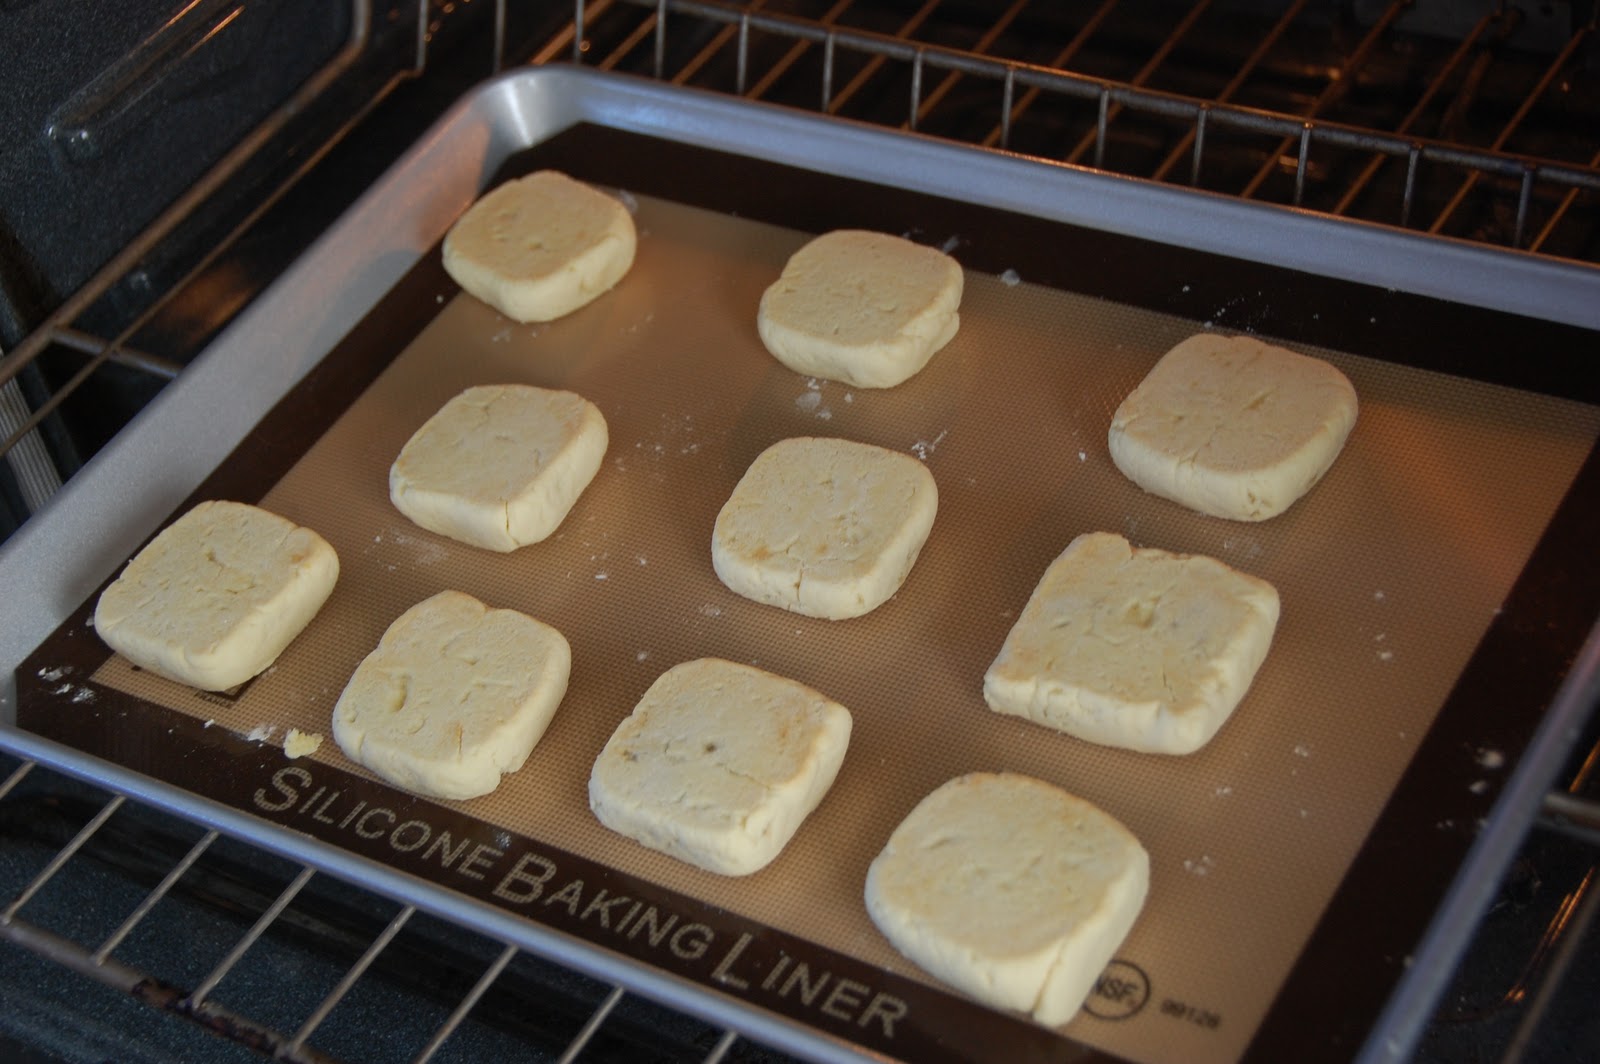
11. Bake the squares for 10 minutes on a silicone lined baking sheet. Flip the cakes over, and continue baking another 12 minutes.
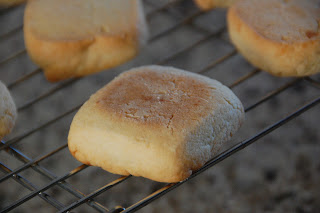
12. Cool, and serve at room temperature.


*drool* OMG you made your own? It looks better than the original pineapple cakes from Taiwan!! Do you have RSS? I’d love to subscribe to your posts. Found your site while looking up where and how much are pineapple cakes in Taiwan since I’ll be making a visit soon. Love the easy step by step instructions with the photos! Are you on yelp too?
DianaWei.Yelp.com
Twitter.com/DianaWei
http://www.HalfEmptyWallet.com
This was great! I lost my aunt’s receipe and had to make some for the Chinese New Year for my students here in Tokyo. This worked nicely. I would strongly recommend getting the pineapple cake sqare frames. They are fun and easy to use and make the cakes bake evenly. Not necessary, just nice to have.
I had filling from Taiwan brought to me by a friend. However, this recipe’s is for real pineapple filling without the winter melon. I will try it next time.
Yes, the square pineapple cake frames probably would give a more authentic appearance… but sadly, I have never seen them for sale here in California.
You are right, my recipe does not call for the winter melon – I guess I feel strange making “pineapple cakes” that mostly have the pineapple substituted for an entirely different fruit!
Thanks for the receipe. What is the cake flour you refer to? Can I use regular general purpose flour?
Hi Sun,
“Cake flour” is a soft low protein flour that gives a finer texture to baked goods. It has a lower protein content than all purpose flour, so it is not a good idea to substitute 1:1 with all purpose. If you cannot find cake flour in your area, the best substitution is to replace 1/8 of the all purpose flour with corn starch.
For example, if you need 1 c. of cake flour, measure out 1 c. all purpose flour. Then REMOVE 2 T. of the flour, and ADD 2 T. cornstarch.
For the 1 3/4 c. of cake flour needed in this recipe, measure out 1 3/4 c. regular all purpose flour. Then REMOVE about 3 1/2 T. of the flour, and ADD back in 3 1/2 T. of cornstarch.
Hope this helps!
Thanks for the recipe! Do you have to use a silicone baking liner? I have a pan that is like a muffin tin instead it has squares..
No, you don’t have to use the silicone baking liner. I use it because it keeps everything from sticking. But you might be able to use the square muffin pan – that actually might be a clever way of getting that nice square shape – just make sure you grease it really well! Let me know how it turns out!
I ended up with too much filling for the amount of dough, and the dough was way too sticky to actually roll even after I added more flour. In hindsight I wonder if it would have helped to chill the dough, or at least let it sit for awhile before I started trying to assemble the cakes. In any case, my husband liked the final product, which is the important thing!
Hi Tia, I’m not sure what happened to your pineapple cakes? When I make this recipe, I usually end up with just the right ratio of dough to filling, and never have problems with the dough. Yes, it is a sticky dough, but with a little bit of flour, it’s usually manageable. You might find it easier to just flatten the dough with your hands instead of rolling it out (that’s what I do). Is your kitchen really hot? If you are making this on a really hot day, then maybe the butter in the dough is melting, making your dough more sticky than normal?
Mika, I love this recipe. My 15 year old son discovered it when he had to do a report on Taiwan and made a food to go with it. I’ve made them twice in the last week and my family loves them. I haven’t gotten the filling thick enough, but I just double the dough and use a little less in each cookie. Both times they have turned out great. Thanks for the very helpful photos and directions.
That’s great! I’m so glad it turned out for you!
I thought the ratio of filling to dough was fine, though it’s tricky to get the filling completely enclosed without the dough breaking somewhere. Overall, I would call this test run a success. I plan to make this for the family when they come to visit next weekend! But… I will be cutting down on the sugar for the filling… 1 cup total of white + brown sugar was way too sweet for my tastes. I’m thinking 1/4 cup each (1/2 cup total) will suffice. Thanks for the recipe, I love that it uses actual pineapple
Hi Anne! Thanks for the feedback! Yes, feel free to decrease or increase the sugar in the filling to your own taste… I know some people like it sweeter or less sweet, so you shouldn’t have any problems with the filling if you add or subtract some sugar.
I visited Taipei a few weeks ago with a friend who is from there.
She told me about the famous Pineapple Cakes and I had to try them. We got a box from the Shun Chen Bakery in Taipei. Needless to say I was hooked and had to go back for more before I left to bring some home and my office.
When I put them out for our morning Staff Meeting, they were gone in minutes and everyone wanted more.
Finding the recipe you provided is a life saver, not to mention to be able to keep my craving in tact.
Thanks for providing such an easy to follow recipe. I know my taste buds will be just as thankful!
Hi…
In your dough recipe…you mentioned to bake them at 350 degrees.
it’s degree Celsius or Fahrenheit?
Thanks!
Hi Douglas. Bake at 350 degrees Fahrenheit!
Hi Mika…
Thanks!
Btw..just two more question…I have tried out your recipe for the fillings… it’s great!
But have you tried using the actual pineapple fruit instead of the canned ones?
another thing is that..I always read people saying about adding winter melon…. is it because we can get a more similar taste to that of Taiwan’s? or is there other reason behind it?
Thanks!
Yes, I do often use fresh pineapple… depending on the price. When it goes on sale for $0.99 a pineapple, I will often buy a few and make these cakes fresh. Regarding the winter melon… I’m not sure why they use part winter melon in some recipes. My guess would be, maybe winter melon is cheaper than pineapple, and acts as a “filler”? I’m not sure though. I don’t use winter melon, mainly because it’s not a very common produce item here in San Diego.
Thank you for the recipe! Tastes like what I remember when visiting Taiwan and will be making these often!
I tried the recipe as listed and had a problem with the pineapple filling not getting thick. I cooked and cooked it and it just never thickened. I’m thinking more than just a 1/2 tsp each of cornstarch and water are needed. I could barely get that little bit out of the cup I mixed them in! So I’m going to try a bit more. I also ended up with way more filling than I could use but part of that was it was too watery to handle. So maybe if I finally get it thicker I’ll use it all. And the dough was too sticky to handle. I’m going to refrigerate it as well before trying to work with it. That would tend to “set” the butter and shortening in the dough and make it less sticky. I just had a coworker go to Taiwan and he brought me back some square metal forms! So I can put mine in the square forms to keep them from flattening out during baking! Lastly, I also got a recipe translated from Chinese that called for mostly the same things as your recipe but had 2 other interesting ingredients, at least as translated. “Malt sugar”, which looks like a thick syrup, and cheese powder. I can see malt sugar or maltose as we would call it, but cheese powder? Not sure how that fits this recipe. The Chinese recipe did call for chilling the dough before trying to work with it.
Hi David,
When you cooked the pineapple filling, did you have the lid on your pot, or was it uncovered? The purpose of cooking the filling is to allow the water in the pineapple to evaporate, and the sugar to concentrate – both these steps will thicken the filling quite a bit. So the pot needs to simmer uncovered. Did you drain the juice from the pineapple before using? The less liquid you add in the beginning, the less you have to wait to evaporate out. Also, you do not add the cornstarch until then end when the filling is already at a thicker stage – the purpose of the corstarch is to gelatinze the remaining liquid in the pineapple.
So, if you cook your filling long enough (uncovered) at some point the water should evaporate and the filling should thicken. For me, on my stove, this takes about 25 minutes total. If your stove is less powerful, then this process may take a bit longer. Don’t count on the cornstarch to do the thickening for you – that’s not the purpose.
You can chill the dough before baking, however, the chilling step makes it a little bit harder to work with and shape the dough. So it’s up to you if you want to try this step or not.
Hey David, regarding the ‘cheese powder’ – I’m sure it was ‘milk powder’. Some translations of dairy ingredients can be way off the mark.
Cheers
Tomás, you’re right. I’ve seen other recipes for pineapple cakes that call for milk powder. Mika covers that in her recipe with the heavy cream. Getting about time to make some more with Chinese New Year just around the corner! I am going to try making balls of filling and wrapping those with sheets of dough and pressing those into the molds this time. My other method described below works but is VERY tedious.
Hello,
What is the recipe for the filling when using FRESH pineapples?
Thank you.
The recipe is basically the same, just use 20 oz. of fresh (peeled/cut) pineapple instead of canned.
Second attempt (this time with forms!!) I had cooked my pineapple in an open skillet actually to have a large surface area to encourage evaporation. I did cook it longer this time, just turning the heat down some once the liquid appeared mostly gone. Finally it did get quite thick, though I did increase the cornstarch/water to a full tsp. of each to be sure. The dough is still VERY sticky, even out of the refrigerator. Basically I end up having to work a good bit more flour into each piece of dough (25-26 gram pieces of dough each by the way). My method is to work in flour until it finally gets workable, then press it out and use the metal form to “cut” a top. I set that aside and then gather up and re-press out the rest of the dough and lay it into the form. Then I press it carefully into the form up the sides to create a nice pocket for filling. Put in the filling and then carefully put the top I created in place and press it carefully to adhere it to the sides. Then I set that on the baking sheet and keep assembling until I have my 10 forms filled. During baking they tend to rise up about 1/8 inch or so out of the forms so the final cake is higher than the metal form. Since this is a shortbread the cakes don’t stick to the form at all, the forms slide right off. Cakes come out nicely though it is a very tedious and time consuming task to assemble the cakes.
Thanks for the feedback, David! I need to see if I can find those metal square molds somewhere…
David, you take a small ball of the dough. You roll it out in the palm of your hand to make a small, flat circle. then you take a small ball of the filling and put it on the center of the circle. Fold the circle around the filling and then put it into the square tin molds. press it out to fill the mold. It should be a little smaller then the height of the mold. Bake and slip it out. It is MUCH easier that way. I have made this many, many times with my Chinese Language Students. They LOVE it!
Hi Mika,
I tried the recipe today and it turn out really well. Except for the filling , I don’t really taste the pineapple flavor. Does your have a pineapple taste. I used the can pineapple instead of fresh. Again, thank for posting the recipe.
I guess it depends on the pineapple? I’ve used both canned and fresh pineapple – and it turns out different each time due to the variation in the fruit itself. You could try adding 1/2 tsp of pineapple extract to the filling and see if that helps next time.
I tried this and ended up using only half the filling and all the dough. I also substituted the shortening for additional butter, and the heavy cream for milk. They turned out tasting more like soft shortbread cookies with a very soft filling, vs the chewy cakes filled with chewy jam that I find in Asian supermarkets. I’m not sure if it’s the way I’m making them, or if the texture in the grocery stores is different because they’ve been sitting on the shelves for a while.
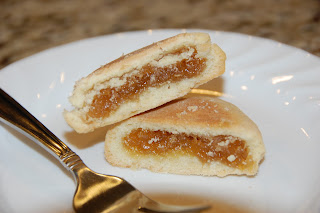
Hi Joyce! Well, first of all… not all pineapple cakes are equal! I haven’t found any in Asian supermarkets here in the USA that I consider good at all…. they are TERRIBLE when you compare them to the fresh bakery versions in Taiwan, and once you have the real thing… it’s really hard to stomach the inferior copycats. They aren’t supposed to be “chewy” like fig newtons. The real ones have a delicate, buttery crust – very similar to shortbread – and the interior is a thick jam-like filling.
Second, by changing the ingredients in the recipe, you actually changed the fat ratio and moisture ratio. Butter actually has water in it, whereas shortening doesn’t. So by substituting… if you do all butter, you are introducing additional water into the dough… if you do all shortening, you are decreasing the water in the dough. Milk is also more watery than cream, and contains less fat.
When you cook the jam filling, you need to make sure that you cook it long enough to get the desired texture. The filling will actually thicken as it cools, so you want to make sure that you allow it to cool before using, otherwise it might be too watery. Not all stoves are equal – so it may take longer or shorter depending on how hot your stove gets (compared to mine), and how humid the environment is where you are. If you only used half the filling, it sounds like the filling may not have cooked enough – it will decrease in volume as the water evaporates while cooking. When I make these cakes, I’m usually able to use all of the filling for the dough.
Mika, I am going to a metal fabricator and have him cut me 20 each 2 inch by 2 inch square stainless steel tube to use as molds. hope it works: )
What an awesome idea!!!! Those metal squares are SUPER expensive! I hope it works.
Hi Mika,
Thanks for sharing this recipe. I’m definitely going to try. One question: if i don’t have access to butter flavored shortening, what can I use as substitute?
Thanks!
You can use regular shortening or lard as a substitute. In a pinch, I think solid coconut oil might work also. Good luck!
Made these for a friend from Taiwan. I’ve never had them before and once cooled they are delicious. Such a light crust and the filling set up perfect. I did have to cook the filling longer than noted, but it is humid here. The dough is very sticky and I ended up adding 1/4 more flour, but I think my butter got too warm. Lesson learned there. Thank you so much for sharing and responding to comments, made it so much easier to understand the recipe. Now I just have to try this with fresh pineapple. Thank you!
You’re welcome!
Made these today and I’m so happy. They’re delicious. I’ll never want the boxed version again. I just ordered square molds on ebay. That should make it an easier project next time. Thank you so much for sharing the recipe!
Great! Glad it worked out for you. Pineapple cakes are my favorite. Last time we went to Taiwan, we brought back 10 vacuum sealed packages of Pineapple Cakes and froze them to keep them fresh – they didn’t last long!
I am an exchange student from Taiwan and I am in USA now. I take a class which called Foods and Nutritions. Now we have to make some international food. Of course I am going to make some Taiwanese foods. Pineapple cake is one of the choices of mine. I don’t think I have ate the Nei Hu Bakery’s pineapple cakes before but there has a famous one in Taiwan which called Vigor and their pineapple cakes are really good. If you get another chance to go to Taiwan again I suggest you to try this. I am sure Taipei has this company.
These cam out great! I made them for my mandarin class at school and everyone loved them! Thanks for the recipe!
My dough was very sticky and closing it around the filling was a little difficult, but I just dusted my hands and counter with a little more flour. The holes sealed up upon baking so no leaking. Thanks for sharing this recipe. I love that your recipes are so easy to follow for dishes that seem so complicated.
Thanks!