Cake decorating is always a challenge for me – but I manage to do it even though I have no clue what I’m doing! To turn out professional looking decorated cakes (with minimal effort and skill) I highly recommend investing in a few jumbo sized star tips (the small ones that come in decorating sets are just too small… I think the Extra Large Tips work better.) These jumbo sized star tips (closed star tip and open star tip) are my favorites for piping a swirl of frosting on cupcakes, or piping a design around the border of a regular round birthday cake. Stores like Target, Michaels, and other craft stores sell sets of the small tips – but I never end up using those – they are basically worthless for my purposes.
Sometimes, I will decorate the top of a cake with swirls of frosting or whipped cream, with fruit and mint leaves, like in my Japanese Strawberry Cake. But if you want an easy way to make a home-baked character cake or design (like for a child’s birthday cake)… you don’t need to order from a bakery. You can do it at home, and it’s EASY! Really. It’s just like tracing lines, or paint by number sets! All you need is a simple design or picture to trace.
To make these character designs, you need to use frosting that has a good amount of fat. Homemade buttercream or cream cheese frosting is best. But canned cream cheese frosting is fine too… just stay away from those “gel” frosting sets that they sell in different colors – these don’t contain fat, and will end up too sticky. One can of frosting is enough to make a character for a 9″ round cake – tint it the different colors you need with food coloring. (I prefer gel or paste food colors since they are much more vibrant, but you can use liquid food coloring too.)
UPDATE: Check out a large sheet cake I made using this technique, with the Disney character Stitch and Hibiscus flower frosting transfers.
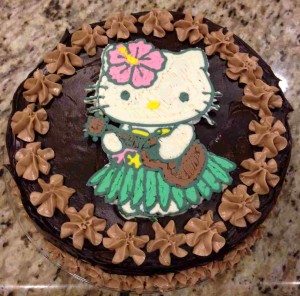
Hello Kitty Frosting Transfer
- 1 can cream cheese frosting
- various food coloring
- 1 sheet saran wrap
- 1/4 tsp. canola oil
- large plate
- picture print out
- piping bags, or ziplock bags with the corners snipped off
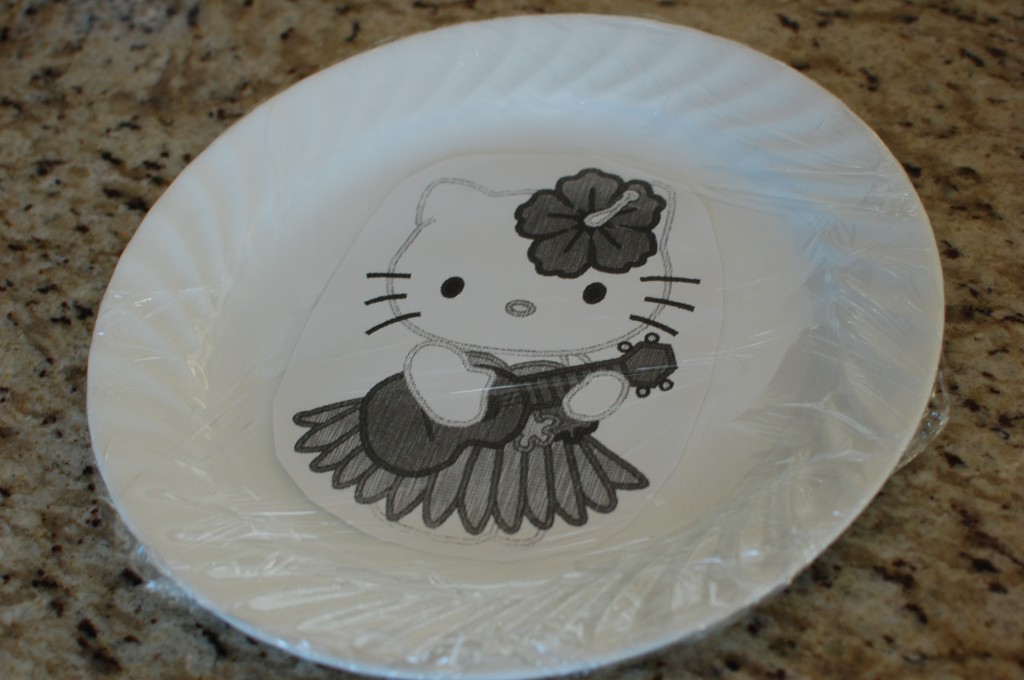
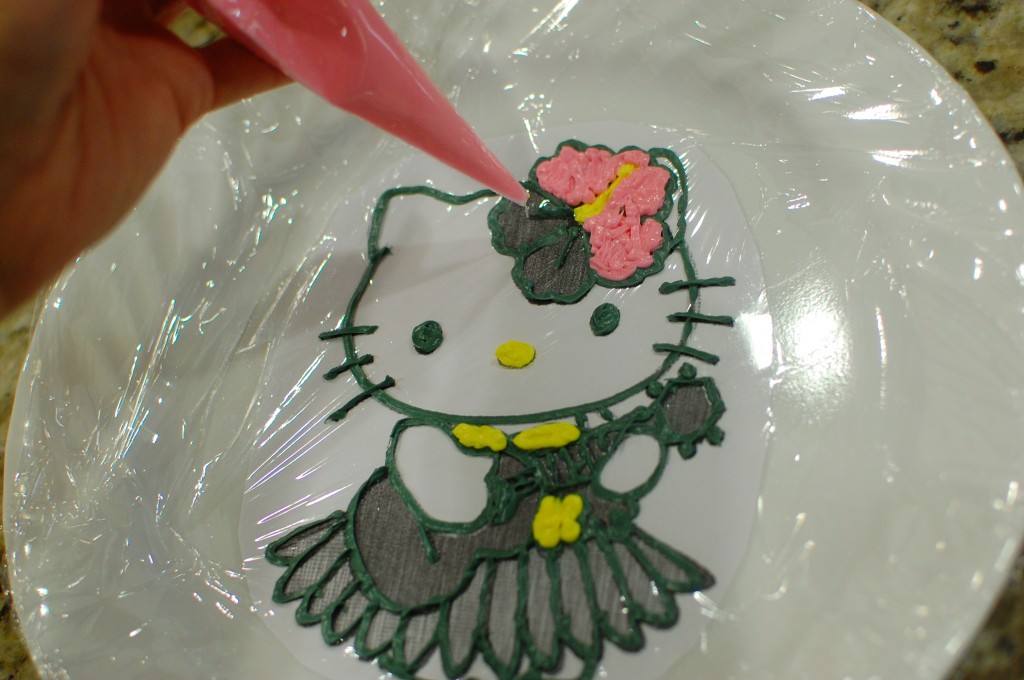
1. Cut around your picture so that it fits on the flat portion of a large plate. (You will want to pick a picture that has some details, but is not overly complicated or intricate. Google search “coloring book page” of your favorite character, and print it out to about 1/2 page size on a regular sheet of paper.) Cover your picture with plastic wrap, wrapping the excess around the bottom of the plate (make sure the plastic is flush with the plate and image to be transferred.) With your fingers, rub the oil onto the plastic wrap surface – this will make sure that the plastic does not stick to the design when you are done.
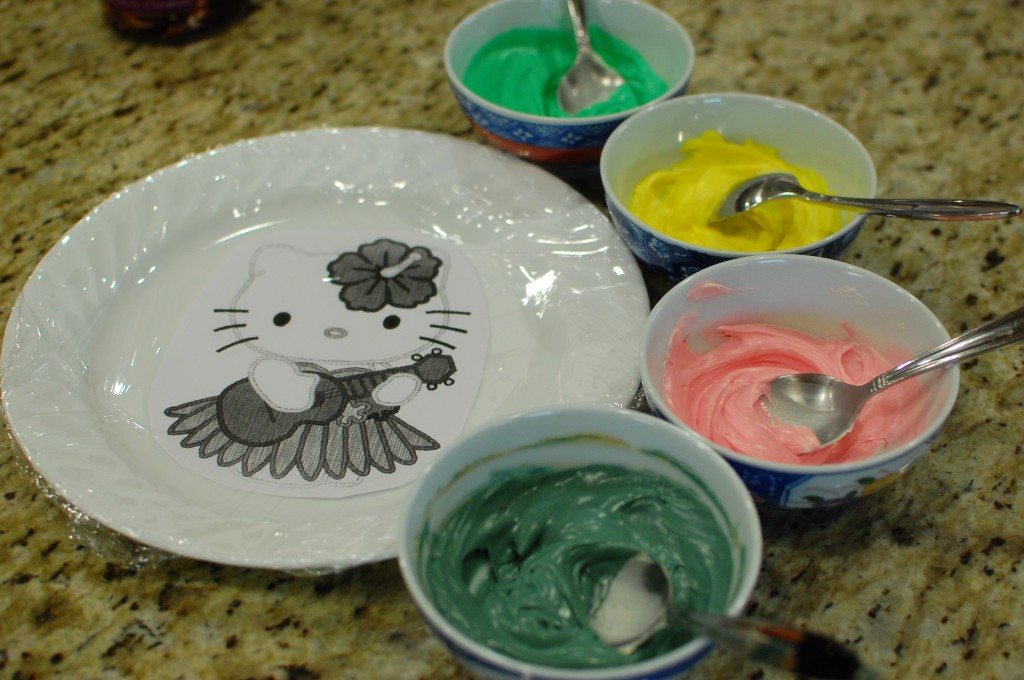
2. Portion your frosting in little bowls in the amounts you think you might need, and tint with the food coloring. Put the various colors into frosting bags with piping tips, or into a ziplock bag and snip off a small piece of the bag corner to make a disposable frosting bag.
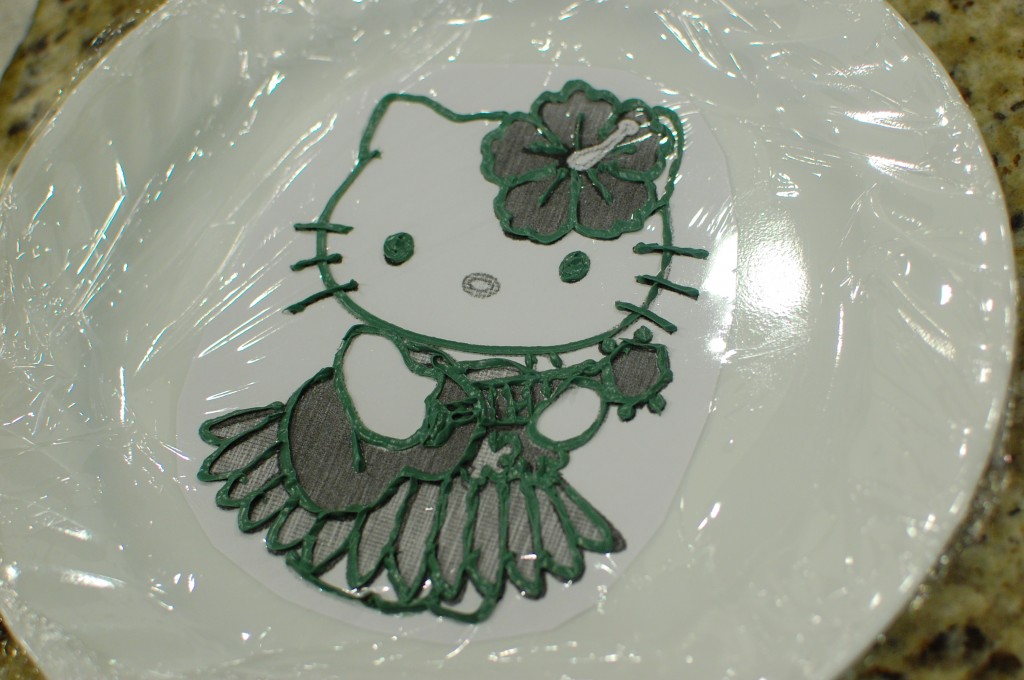
3. Starting with a neutral color, like gray, outline the image. (I used green… because… I felt like it.) Put the plate in the freezer for about 10 minutes to harden the outline.
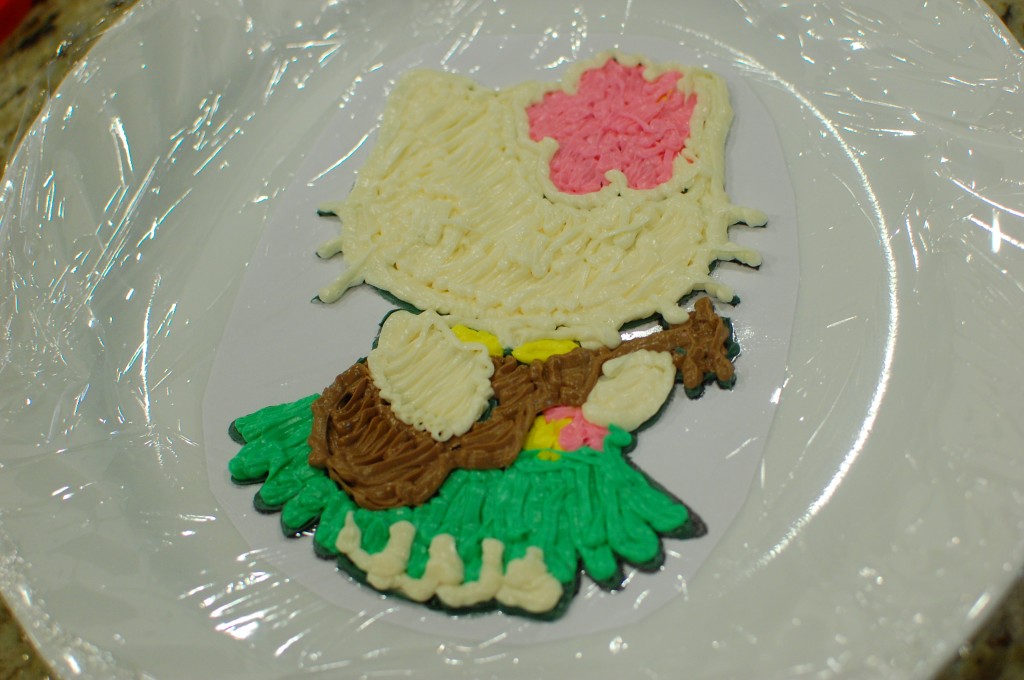
4. Fill in your image, starting with the details that you want to make sure are shown in the foreground first. (For example, small details such as eyes, nose, the pistil of the hibiscus flower, etc.) Remember – the bottom of your design (the part touching the plastic wrap) will end up being the front of your frosting transfer.
5. Once you have filled in your details, you will now want to color in any broad areas. Once you are done, you want to make sure your colors are a little bit overlapping so that you end up with one whole frosting piece – not a bunch of pieces that break apart. (I did this in a hurry – so you can see my “coloring” is more like scribbles. If you take your time when filling in the large areas, your image will come out a little less sloppy.)
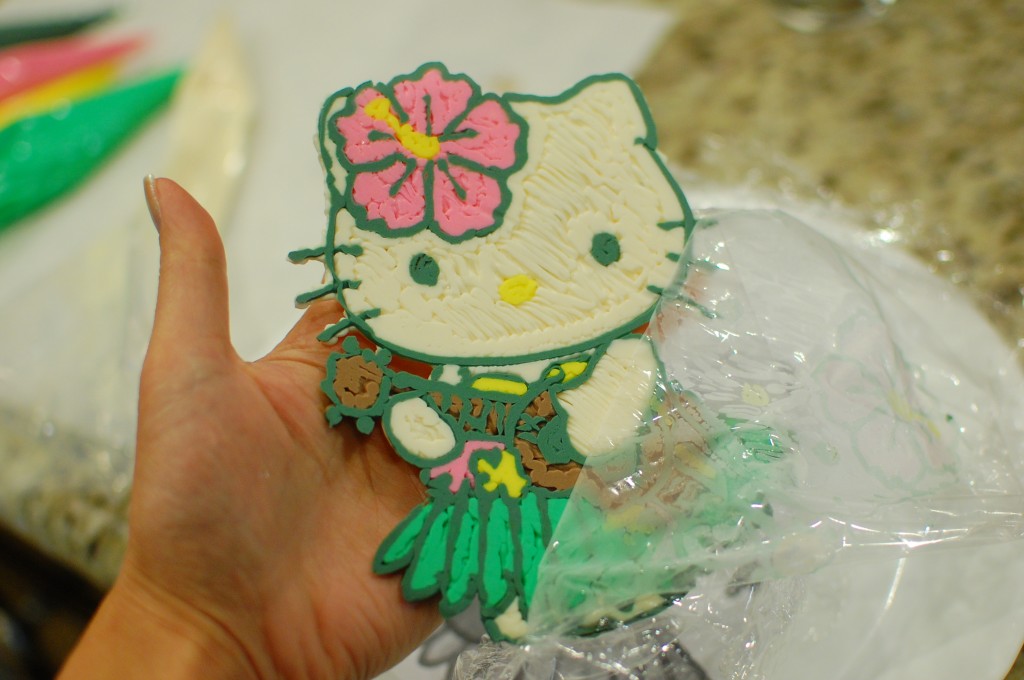
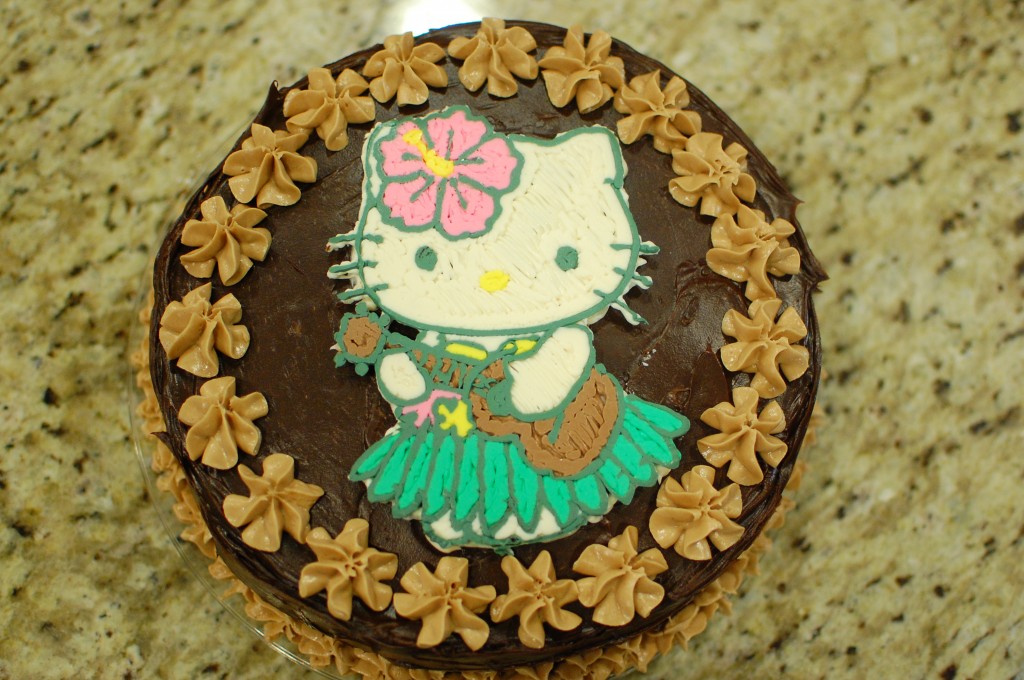
6. Put your plate into the freezer for an hour or two until solid. Then, carefully remove the plastic film from the top of your frosting transfer and immediately position onto the top of your frosted cake. Do this quickly so your frosting transfer doesn’t melt and soften.
7. Once you have your frosting transfer in place, then decorate the rest of your cake however you desire.



So adorable Mika! You really are creative with your cooking ideas!
Thanks, Mary!!
Brilliant idea – truly brilliant!! Thanks for the step-by-step directions – now I know what to do for my kid’s birthday cakes!! Printed out coloring pages can work well for stained glass patterns too, just FYI.
Yay! I’m glad I could help. This really couldn’t be any easier…
Would this work if I want to place it on the sides of the cake instead of on top??
Probably if it’s small enough and not too heavy! Just don’t touch it once you place the frosting transfer onto the cake. Once defrosted, the transfer will be the same consistency as frosting, and will be really soft and easy to mess up. Something that is too large might have the tendency to sag… but a small design like a flower or small character would probably work…
What if I want to make a bigger picture…paper plate are not big enough….what should I use?
First of all, I don’t typically recommend using paper plates when making frosting transfers. The plate above is a regular dinner plate. The reason for this is that a regular plate will get cold, and help your frosting transfer to reach the proper temperature, whereas a paper plate will have an insulating effect – the front of your decal might not freeze as hard. Once you remove the decal from the plate, you don’t have much time to remove and position the frosting transfer – it will literally melt in your hands if you don’t hurry up. For that reason, I wouldn’t recommend making an overly large frosting transfer – it will be too hard to handle and position correctly onto the top of your cake. It certainly can be done, but it will be much harder to do – that’s a lot of time and work spent that could potentially be ruined. If you do want to give it a try, then maybe use a large flat serving platter or metal cookie sheet? I think it would be a lot easier to make several small frosting transfers which you can use to decorate a larger cake, as I did in this half-sheet cake:
http://www.the350degreeoven.com/2013/03/cake/how-to-make-a-large-red-velvet-sheet-cake-disney-lilo-stitch-birthday-cake/
Thanks
Will this work with store bought whipped frosting I’ve done this before with Pillsbury reg frosting but I have a request for whipped this time…
I don’t know. I would just use the whipped frosting to decorate the cake, and use regular frosting to make the frosting transfer. Whatever you use has to have a lot of fat in it to prevent it from sticking. The frosting transfer does melt and soften quite quickly and my worry would be that something whipped has a lot of air in it, which could melt even faster making it very difficult to remove and position on your cake.